Change out that PCV assembly on your EJ25! Now with less oil in the intake tract!
Keeping up on your maintenance is key to your EJ25s health and happiness. The Pcv is an often overlooked part of this puzzle, given it doesn’t have a standard maintenance time unlike oil or differential fluid changes. A good time frame to follow is 30k miles or 3 years, if your car sees plenty of short quick trips you may want to change it even more often.
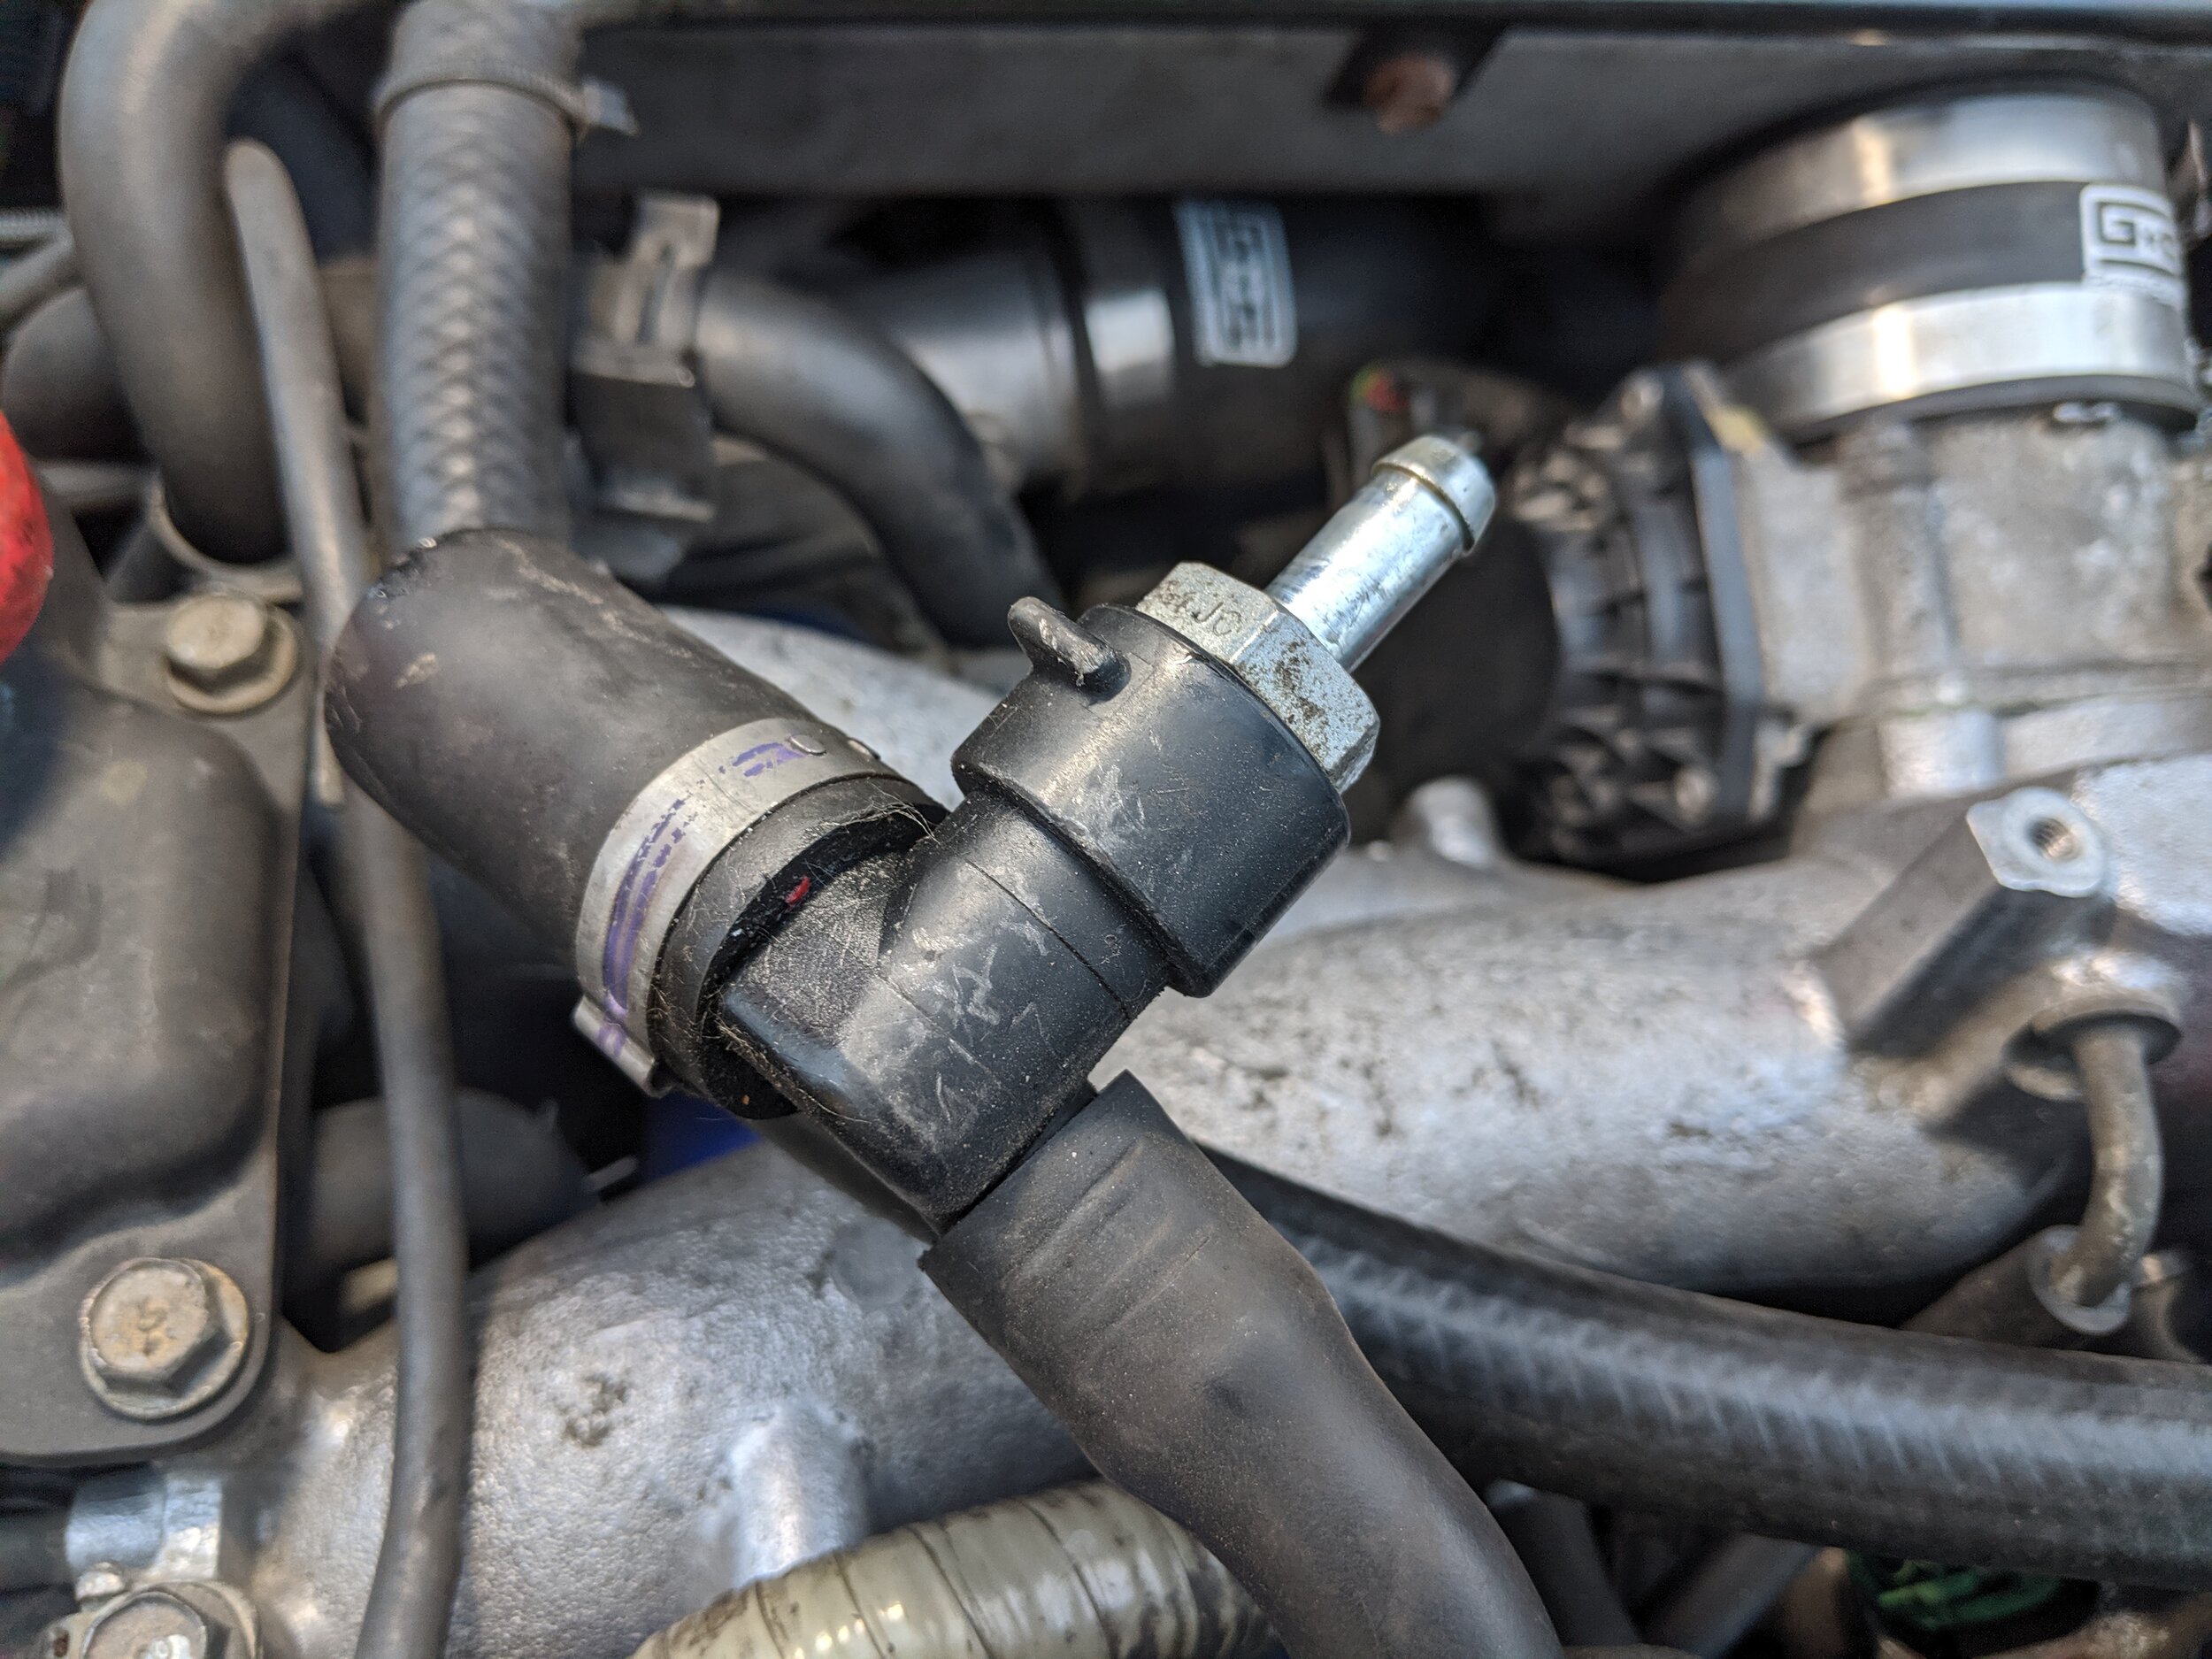
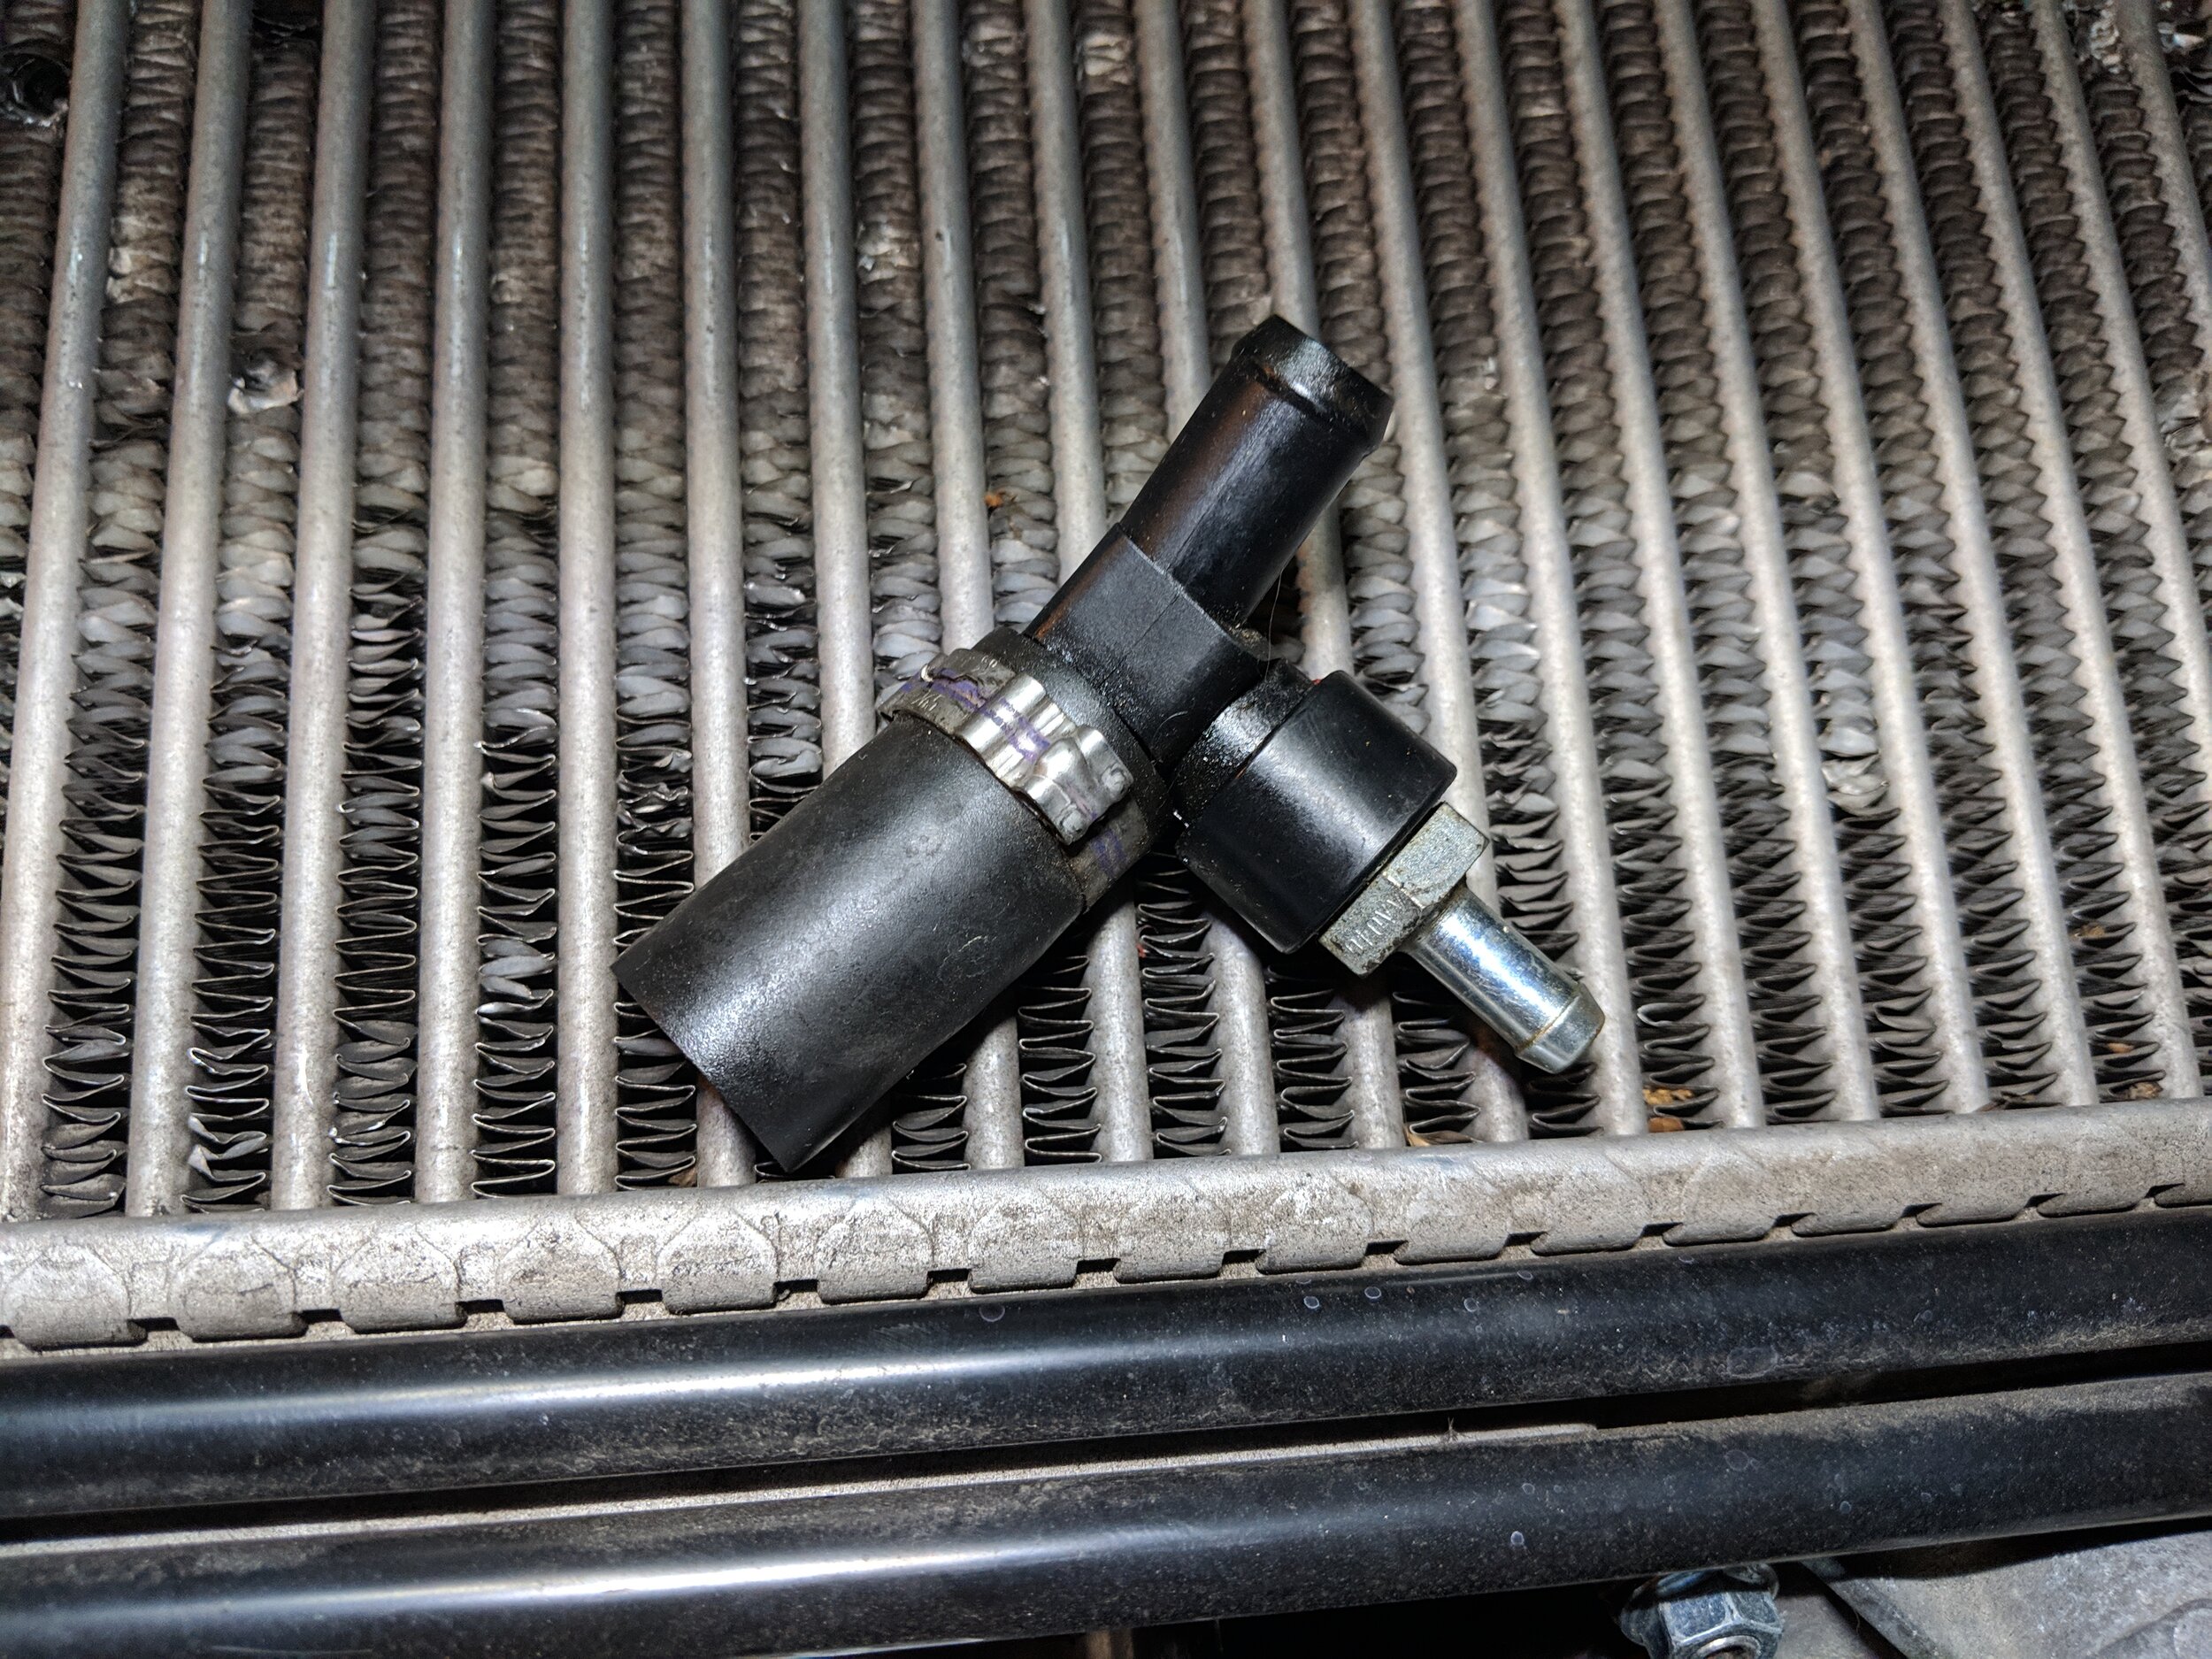
This is the Subaru Pcv assemble without the upper hoses on it.
What is a PCV valve and what does it do? PCV stands for positive crankcase ventilation, when the pressure inside the engine is too high this valve opens and allows the pressure to be transferred to the intake tract. Given the engine crankcase is full of oil when the valve opens it can/will allow oil to flow through this valve. With enough heat cycles, engine pressure and oil this valve can degrade and even fail.
A failed PCV will be stuck open and engine pressure will be able to flow through to the intake tract and cause your engine to ingest oil. This will lower our fuel knock rating and can cause detonation and lowered engine performance.
Time Frame
Replacing your PVC assembly on your Ej25 will be around 15-20 minutes as long as all the hoses come free easily. After many heat cycles and being so closely located to the turbo, it is a given that the hoses will be a bit on the brittle side.
Tools
As with any install we will need a few tools to help us with our install. This one is among the easiest and least tool assisted installs. With the Pcv assembly being just attached by hoses and clamps.
I use a set of Mac pliers and Knipex to take care of these pesky hose clamps. Anything will do but these are my go to.
A good magnet tool is a great tool to have through any work but it can be exceptionally helpful if you don’t want to remove your TMIC.
Knipex pliers never let me down.
A good magnet tool is a great tool to have through any work but it can be exceptionally helpful if you don’t want to remove your TMIC.
If you decide to remove your TMIC for this install here is the link for the tools necessary and how to. TMIC removal.
Parts
Another short list here as our only part will be the Subaru Pcv assembly. The Pcv is built within a plastic housing that connects to the block via a large hose instead of the more typical systems.
With this design it appears this part can only be sourced from Subaru with the part number being: Subaru 11815AB71
This is the complete unit you will receive from Subaru. The hose with the white connection goes to the intake and the smaller longer tube runs beneath throttle body. The larger short hose on the bottom goes to the engine block.
Install
To begin this install we will want a moderately cool engine as we will be shoving out hands around coolant lines and they can be quite warm. You can now pop your hood and make sure it is supported properly.
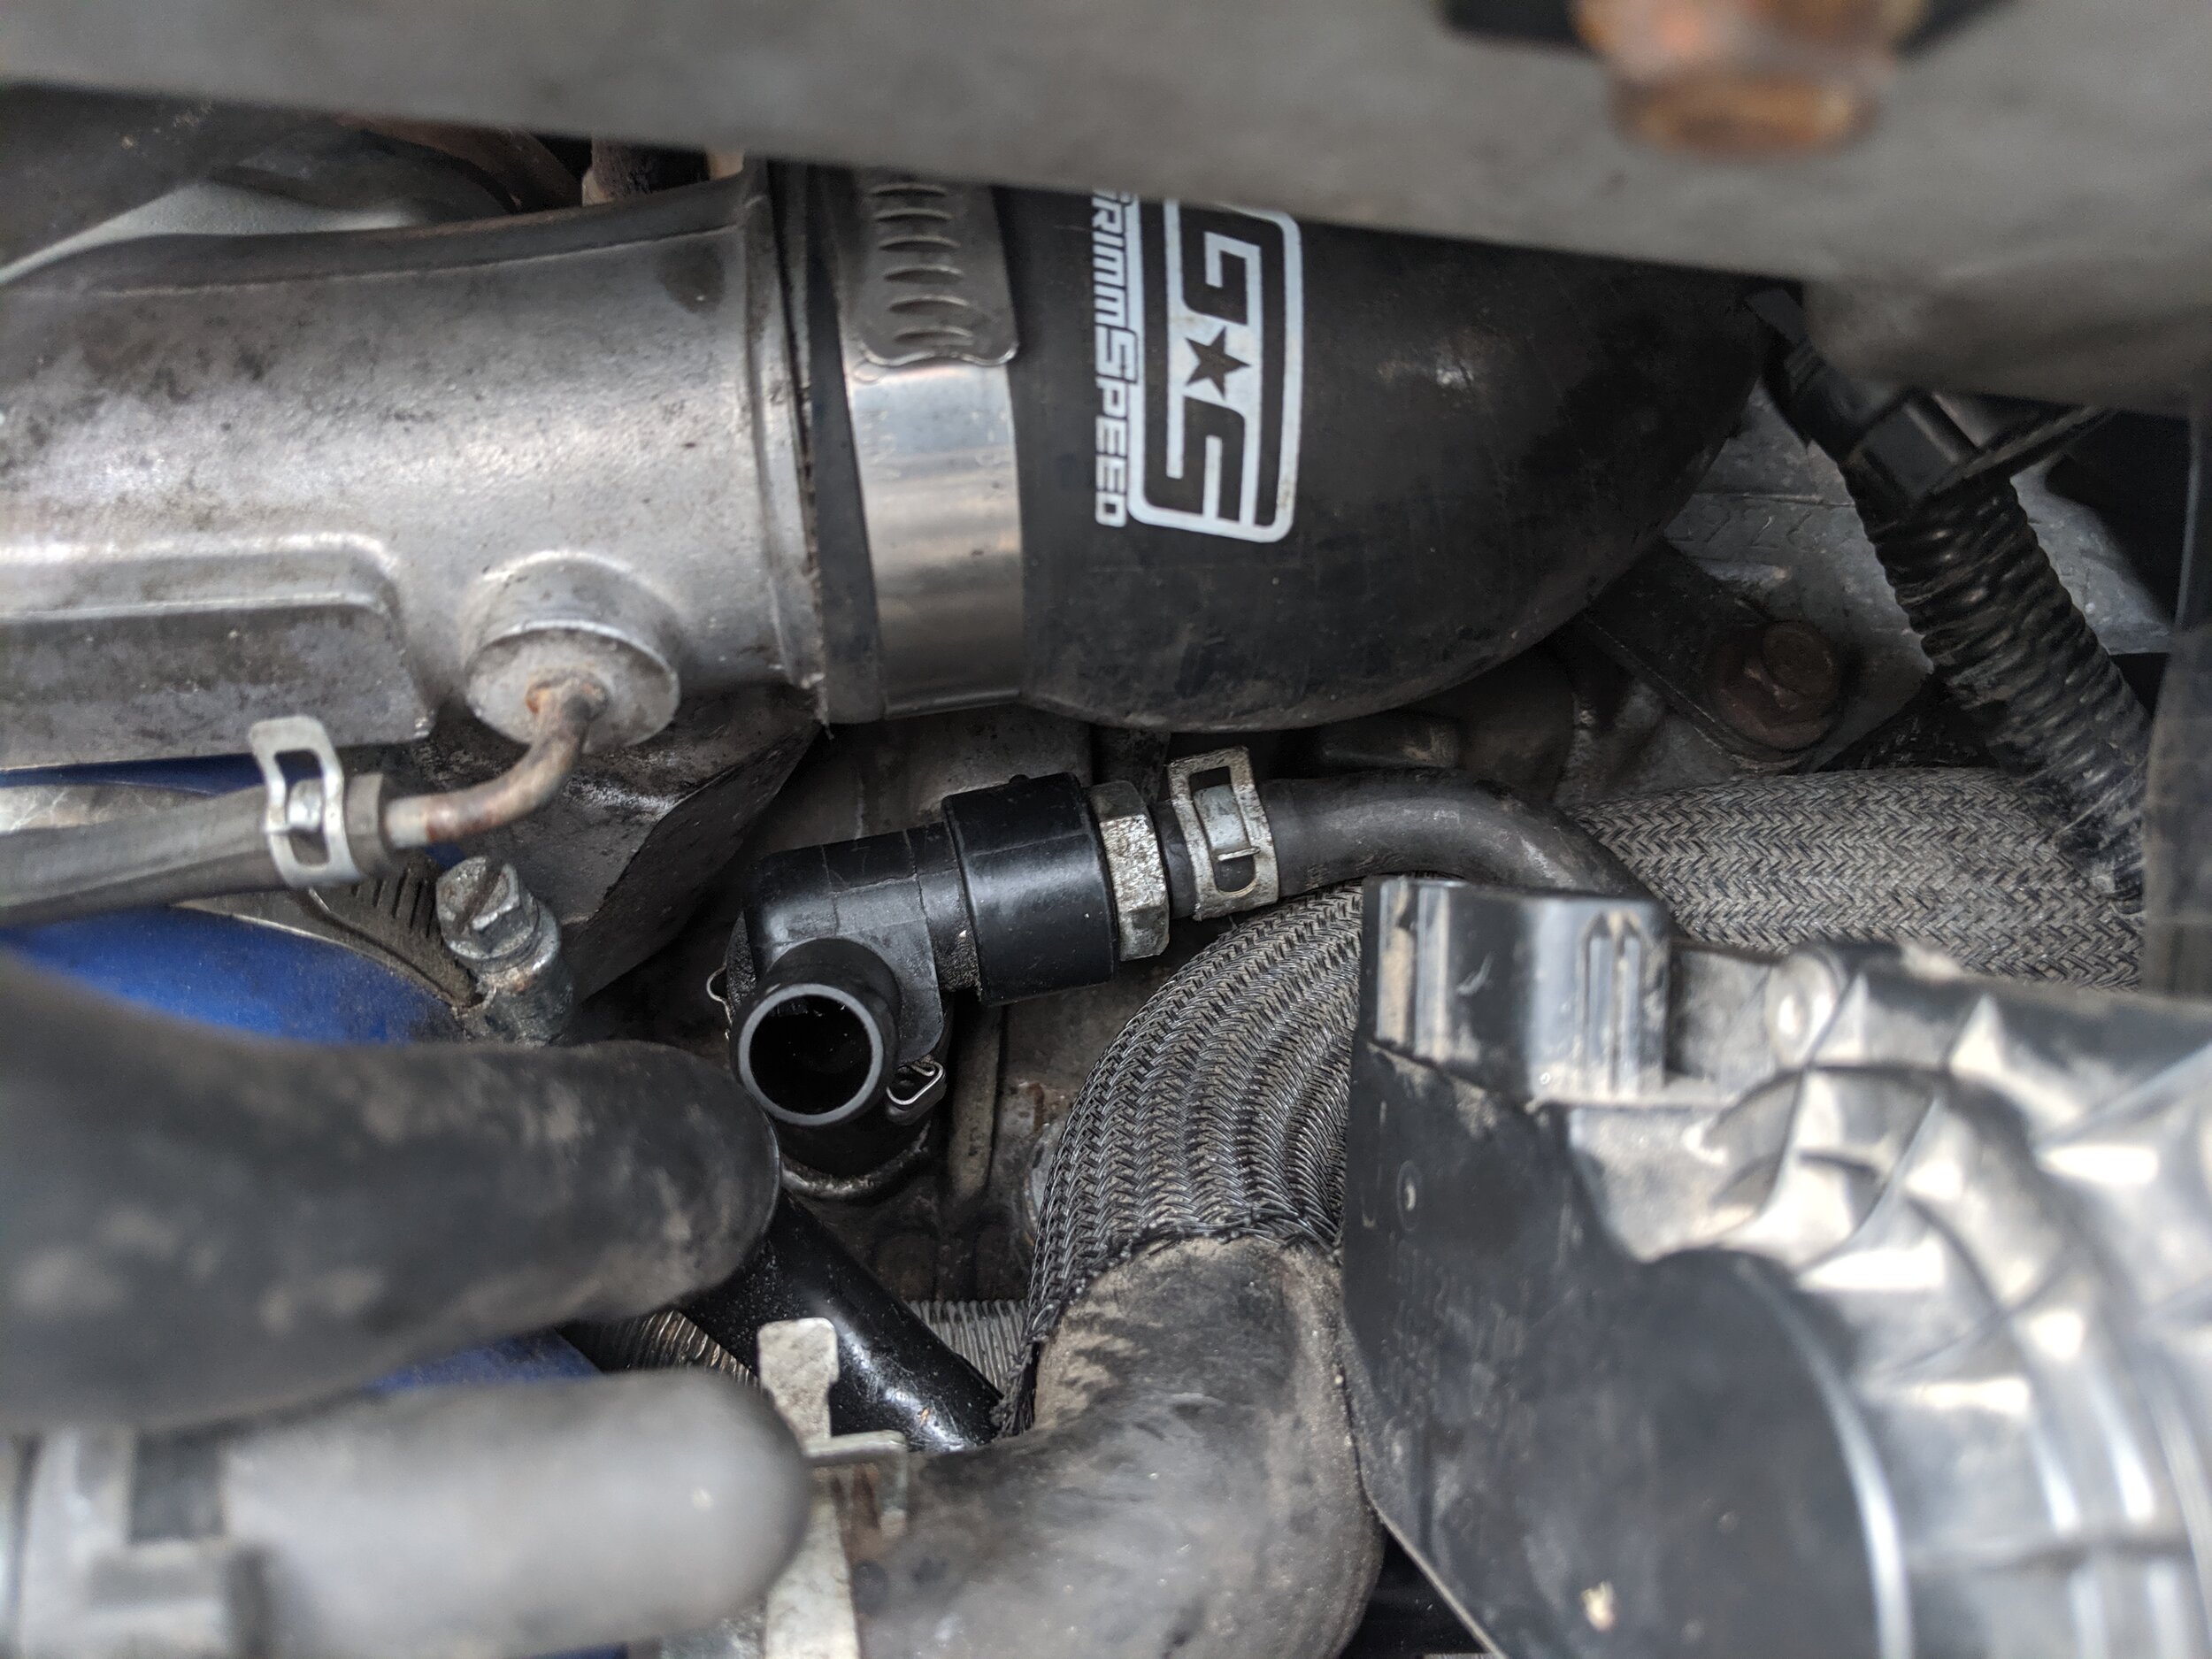
Now we can begin our search for this hidden part, it can be easily overlooked. The location we will look is direct to the left of the throttle body, determined by your setup it should be fairly visible.
Tucked in with many other lines, it resides in front of the turbo and just to the left of the throttle body.
There is a connection on top of the factory that you will need to disconnect. This connection tells the ecu that the assembly is connected and in the properly location, otherwise no information is gained. There is a hose that runs to the top of the turbo inlet will also need to be disconnected.
This upper connection is where the Pcv white connector and electrical plug will attach to.
If you still have the factory inlet this is what you will see. This white and gray connector is what tells the ecu that the pcv is hooked up properly. If you have upgraded to an aftermarket inlet you will have a different setup, shown below.
Having that electrical connector disconnected you can do one of two things. Remove the hose that runs underneath the throttle body a the pcv assembly or you can remove the hose at the throttle body. This hose can be really tricky to disconnect without removing the intercooler. I have completed it both ways, so the choice is up to you. If the hose feels very brittle or hardened it may be in the best interest to replace it completely,
This is what the electrical connector looks like unplugged. If you have a Turbo inlet installed you have likely disconnected and moved yours too. If you have the stock unit this is your plug.
Upper hose removed.
After disconnecting the two upper hoses you can move to the bulk of the assembly. With a good tug you can pull the assembly straight out. Many heat cycles and the brittle hose can make this make this trouble. But a couple good pulls should dislodge it from the block. If it is the original Pcv is may have a clamp at the bottom. You may need to use flat head screwdriver to undo this clamp and allow to come out.
Pulling straight up on the assembly will expose the engine breather port it attaches to. You can now be ready to install your new unit.
With both upper hoses off you can now take it out of the vehicle. If you need extra room to disconnect this hose, you can pop the throttle body connector off.
Ready to be replaced!
Now you can give the pcv assembly a good shake, a rattle noise within the it is a good sign. If you don’t hear a rattle oil has gummed up the unit and the check valve is no longer working. Which can will cause either excessive pressures within the crankcase that can cause blowby or allow the engine pressure to flow freely between the crankcase and intake track. When the car goes into boost the engine can easily suck oil and oily air through the valve causing the engine to consume oil.
Short trips will cause oil and water to break down.
Here it is removed without the upper hose connected or the throttle body hose. The replacement unit I was installing was from the STi so the hose to the intake manifold was left in the STi, therefore the Fxt hose was left in the vehicle.
Installing the new pcv assembly is the reverse of removing it. Lines that were disconnected need to be reconnected and replaced if they were removed. I often leave the lower Pcv clip off as the nigh impossible to get back on and after a couple heat cycles the tight fitting rubber hose is basically welded to the block.
Installing the intake manifold hose, in this method it can be helpful to remove the throttle body connection to allow for a bit more room.
The small clamp on the hose that leads to the intake manifold loves to slide down and get lost. With a magnet tool you can get it back up in place, this method has worked for me many times.
The hose clamp ended up sliding down the hose, with a magnetic tool you can get it back into place.
Getting the clamp back into position.
Everything is back in it’s place and the engine is ready to be started.
With this you are complete. It is a a good time to double check all your connections, now you can start the engine and double check for any vacuum leaks. Lastly, a quick spin around the block will make sure everything is running well, you can open the hood after this drive and check your connections one last time.
Congratulations! Just another key to helping your engine live longer and run better. You can take this one step further with the installation of an AOS or catch can to work together with the Pcv system or take over for it.


