DIY: Automotive air duct cleaning! Keep that air breathable with the A/c on full tilt!
When the months get hot or cold you will find yourself in a constant vent vortex of hot or cold air! Given that your car sees all the elements it is easy for rain, dirt, dust, etc to make it inside your car. With the right temperatures and collection of filth you will find your A/c vents may not have that summery fresh smell they once did.. and you think to yourself I just changed that cabin filter, what could it be?
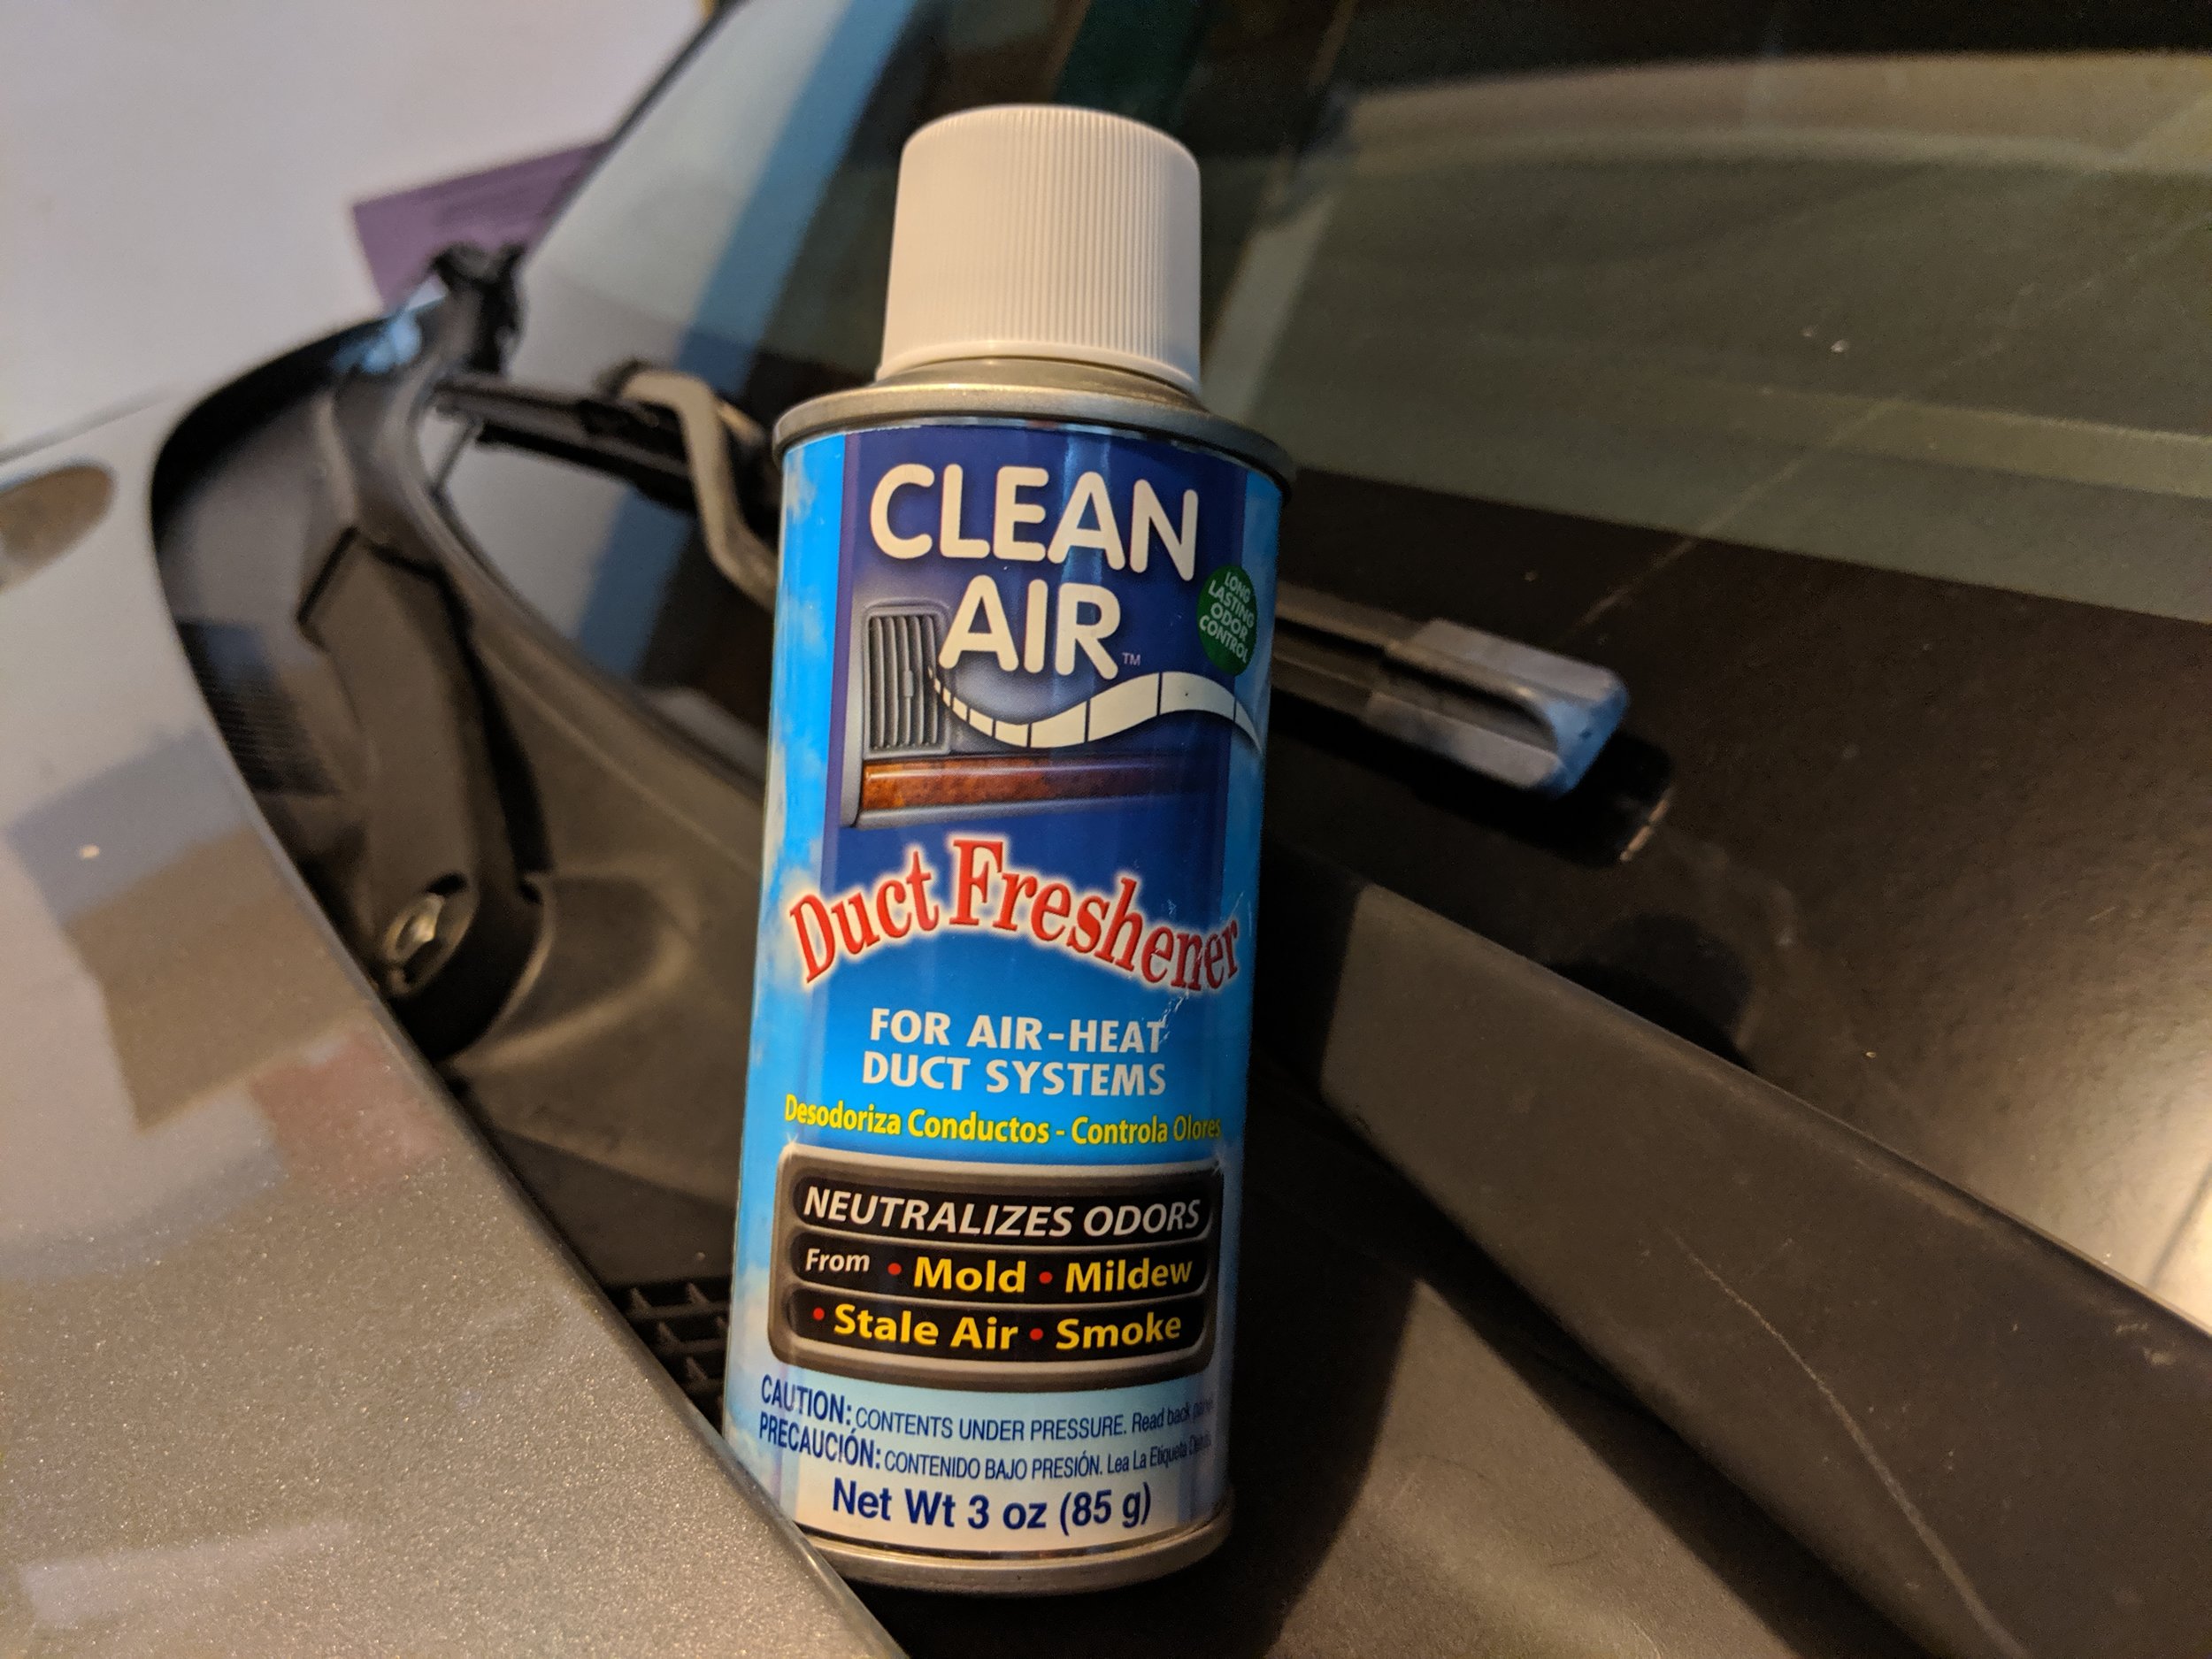
This is the good stuff. I have had great luck with it on STi, now it is the Forester’s turn. Clean air duct freshner linked here.
The front cowl and dash house quite a bit of ducting for the A/c, heat and defroster to blow through and we need a way to clean/neutralize those less wanted smells. Enter the Clean Air duct freshner, this little can of will fly through those ducts and neutralize those odors.
Parts
Clean air duct freshner is the necessary step to those of us looking into used vehicles. Given the fact you are unable to control what has been inside your used car before buying it, now is your chance to revitalize it! Being that I purchased both of my cars used, the STi was owned by a light smoker and the Forester XT by a dog loving family, they were both in need of a freshening up.
From beginning to end this will take you less 30 minutes to complete. Having a nice open parking area or driveway is helpful as you will need to open and close the doors and leave the car running. Other than your hands and your keys you will be good on the tool front,
As far as products we will just be using the Clean air freshner bottle. If you are replacing your cabin filter I have this handy guide -here- and giving the filter a slight spritz will give it that extra oomph of freshness.

If you can’t remember the last time you changed yoru cabin filter or just bought the car, it is probably time to change it! DIY link here for 03-08 Foresters: Cabin filter replacement
How to
Start off by opening both front doors and attach the nozzle extension and locate your air vents. Then spray for a second or two to start the process. Or if you like me and have misplaced your nozzle extension, feel free to tip the air vents up and spray down them.

Vents are here…

there…
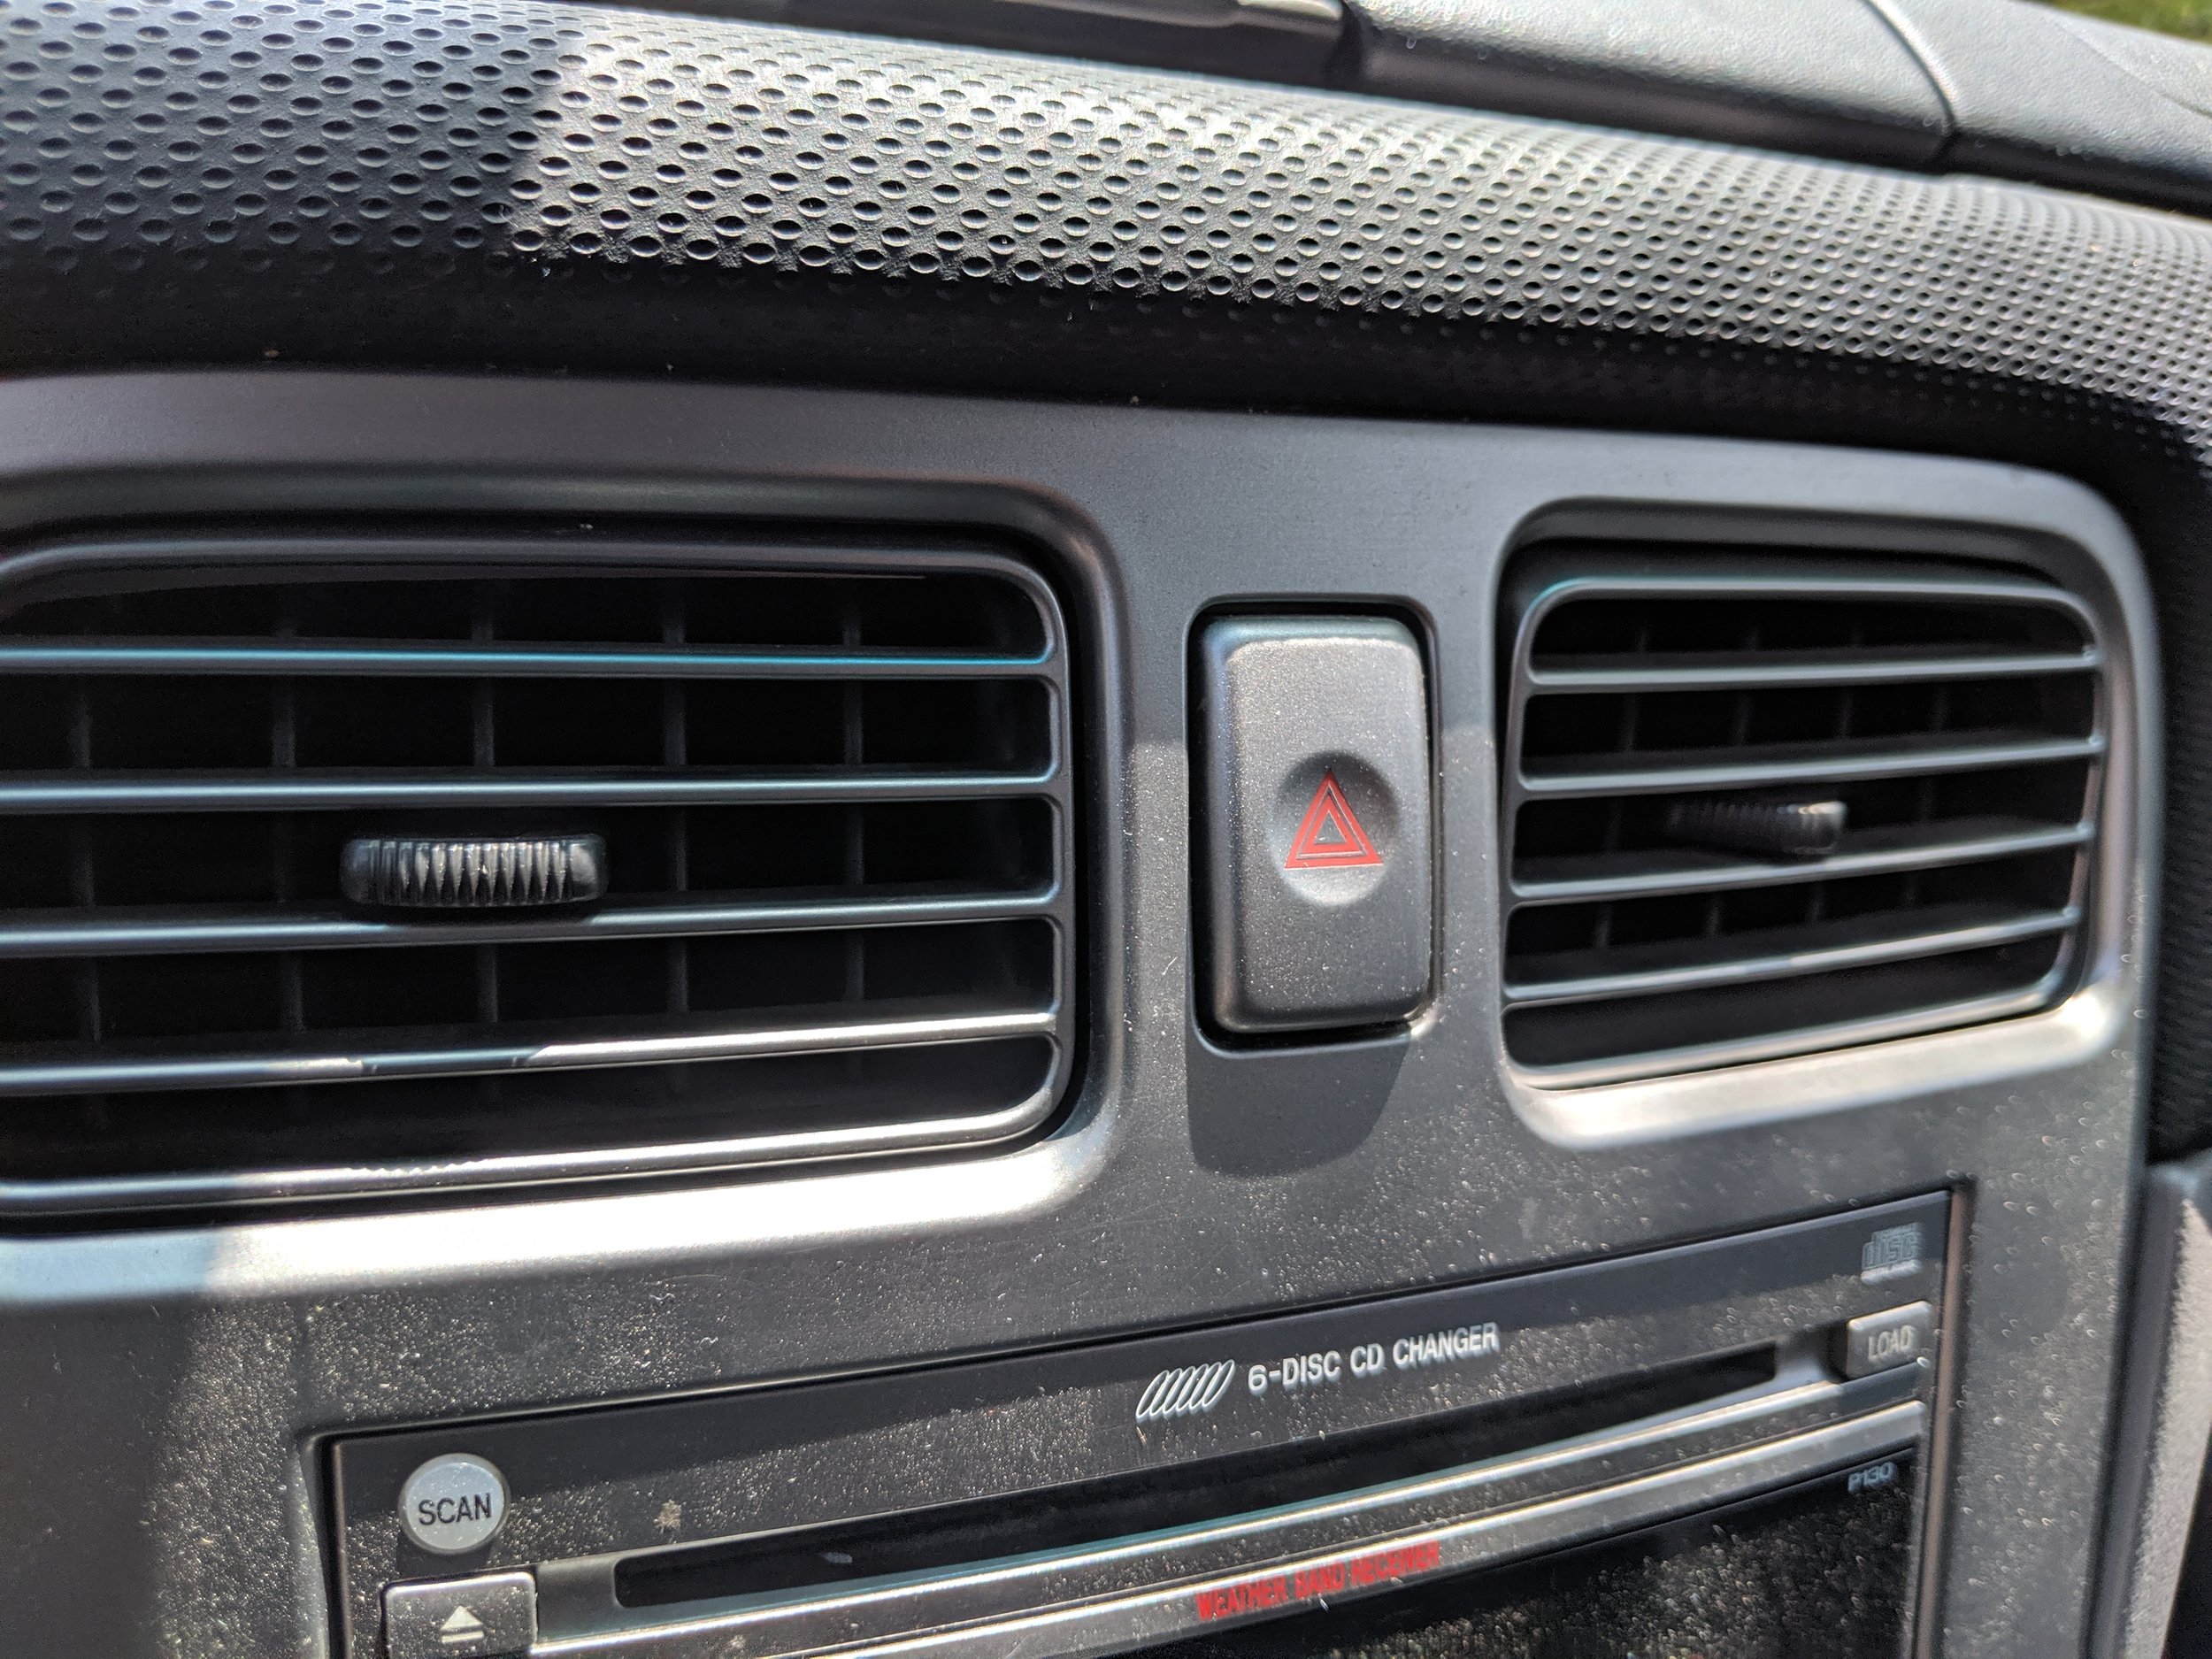
..and everywhere! But not really, they are all located across the dash.
Next we will start the car taking precautions to make sure your car is in park and the parking brake is set. Turning the A/c to max speed is the next step and then pushing the recirculate. Now you will search for your recirculate air intake, the majority of vehicles have it located on the passenger side under the glove box. You will remove the nozzle and spray about half of the can in this location.
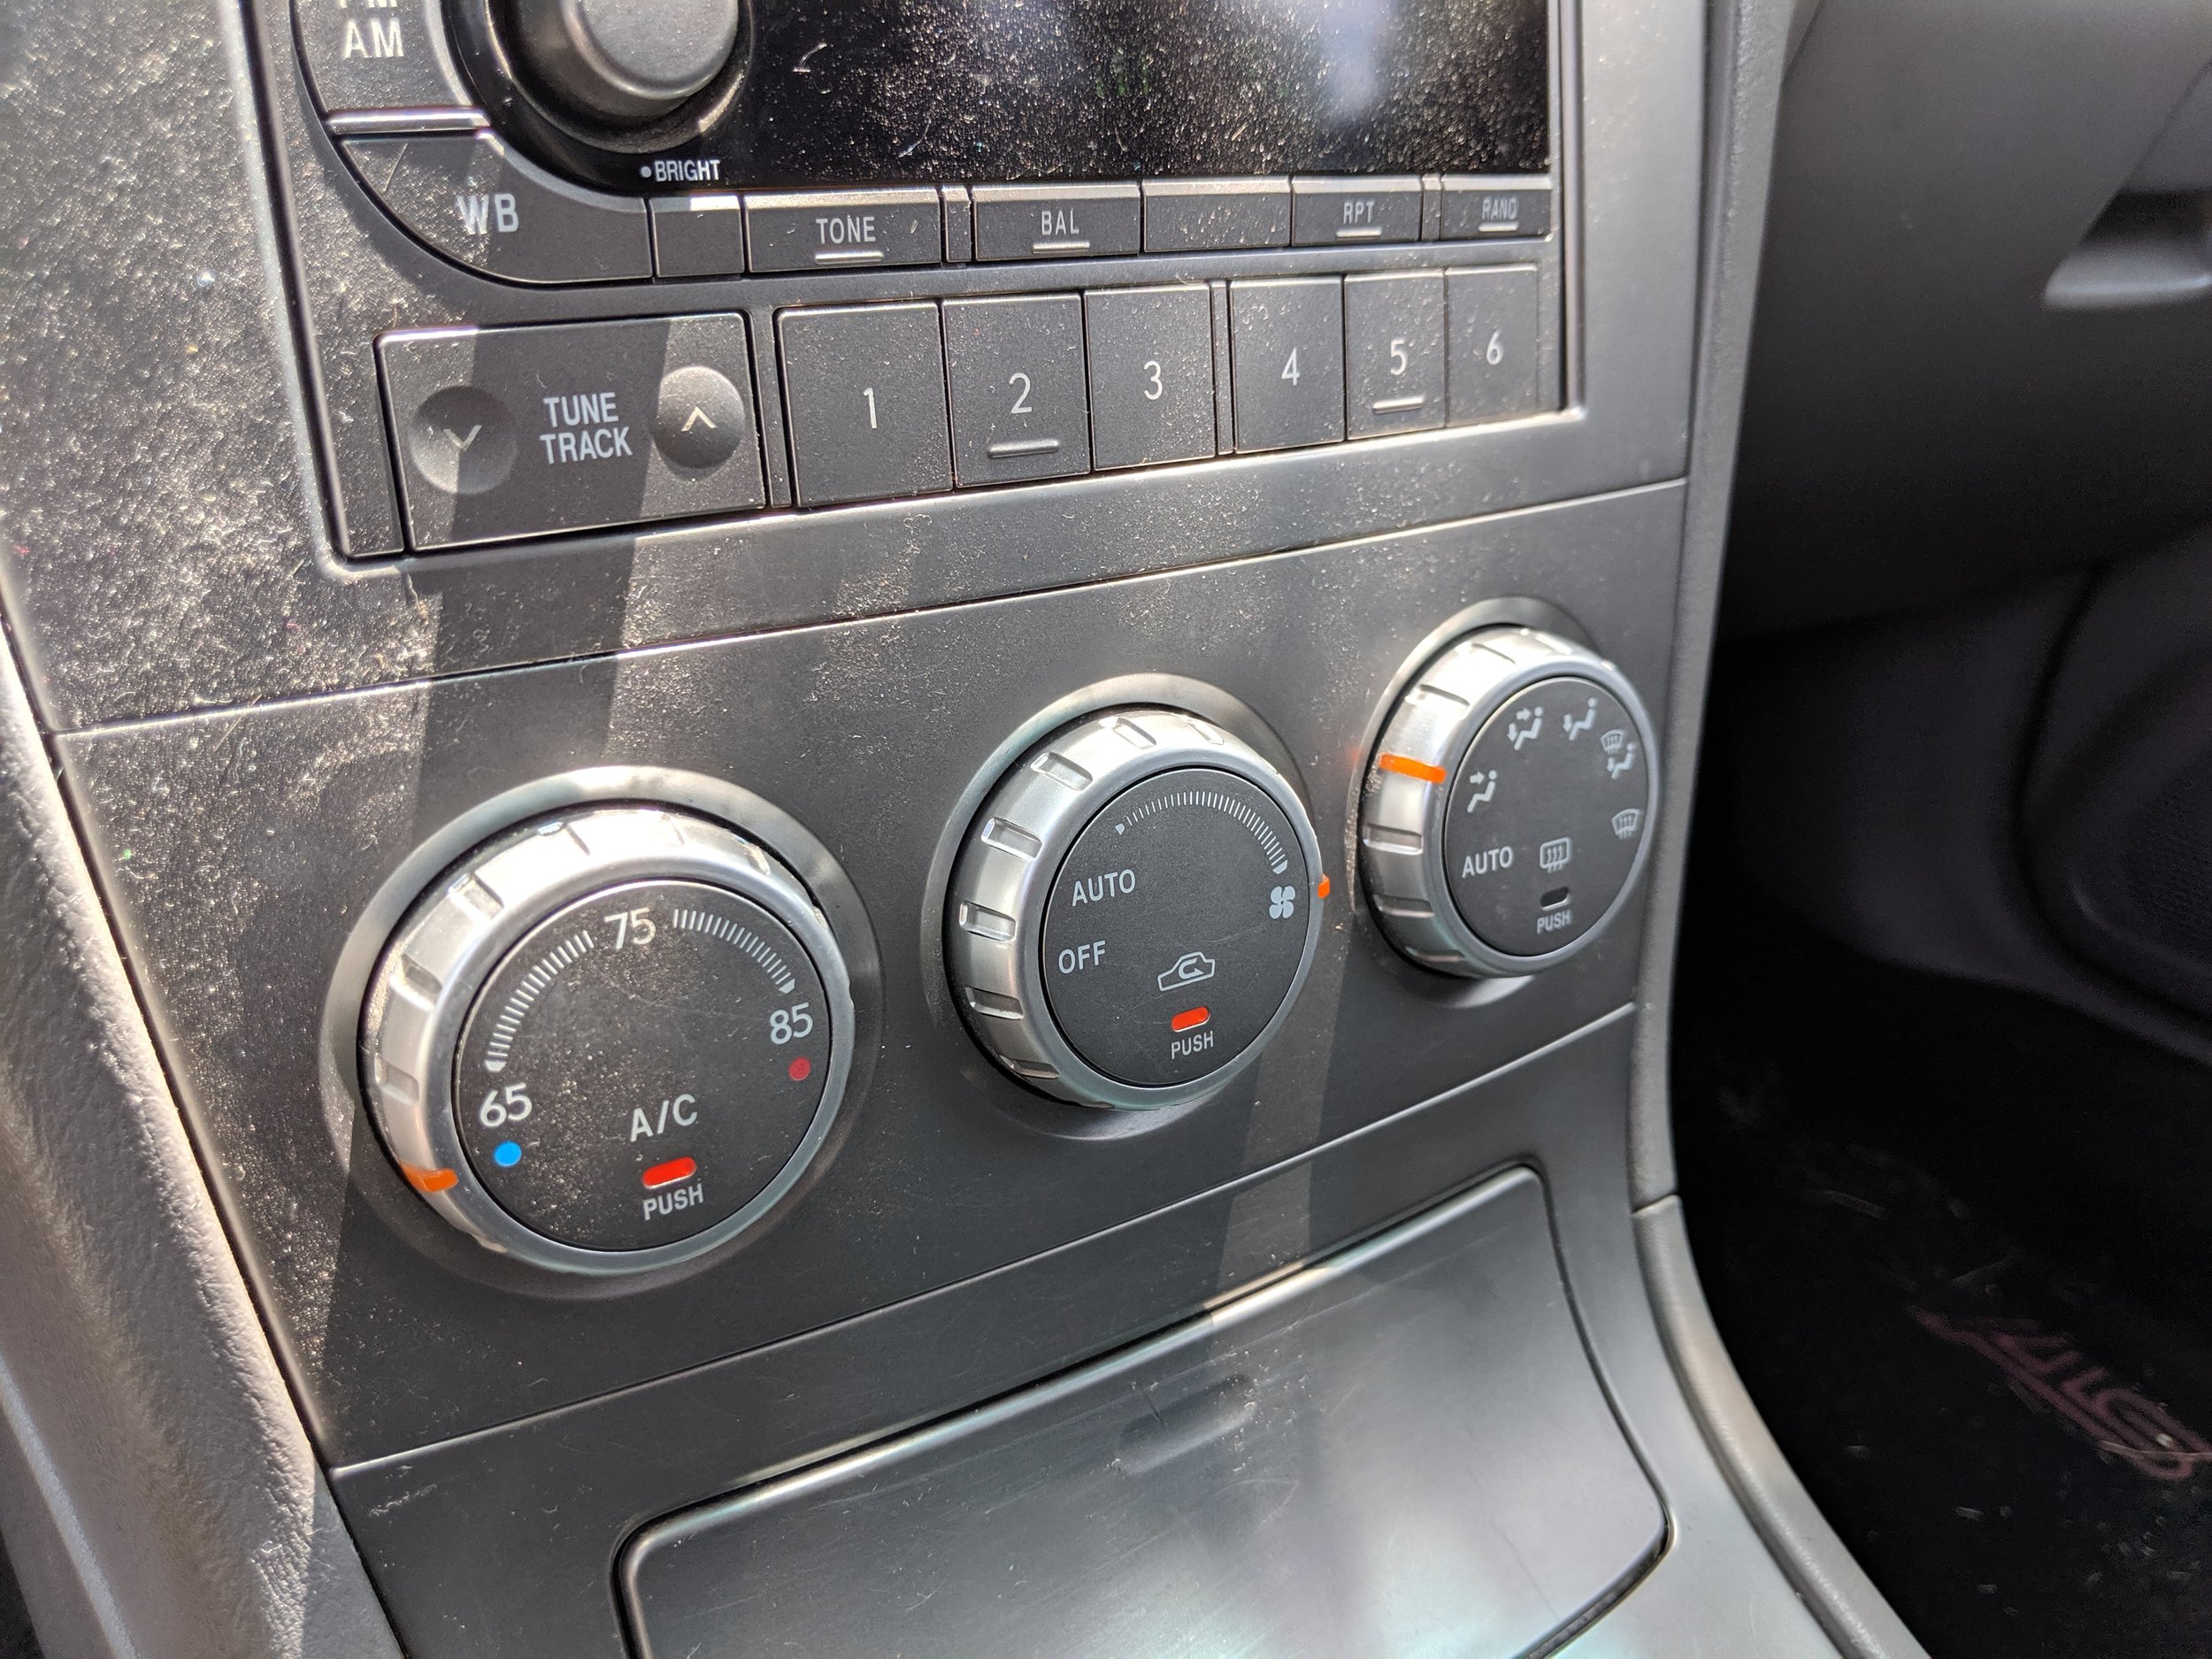
Changing our A/c settings here, move your center dial to max fan speed. We are ready to use the recirculate to help it travel around the system. Your doors should be open during this step.
Under the glove box resides the blower motor and recirculate intake. Move your hand around and locate the source that is drawing air in. Then spray half of the can towards it. Make sure your doors are open during this procedure.
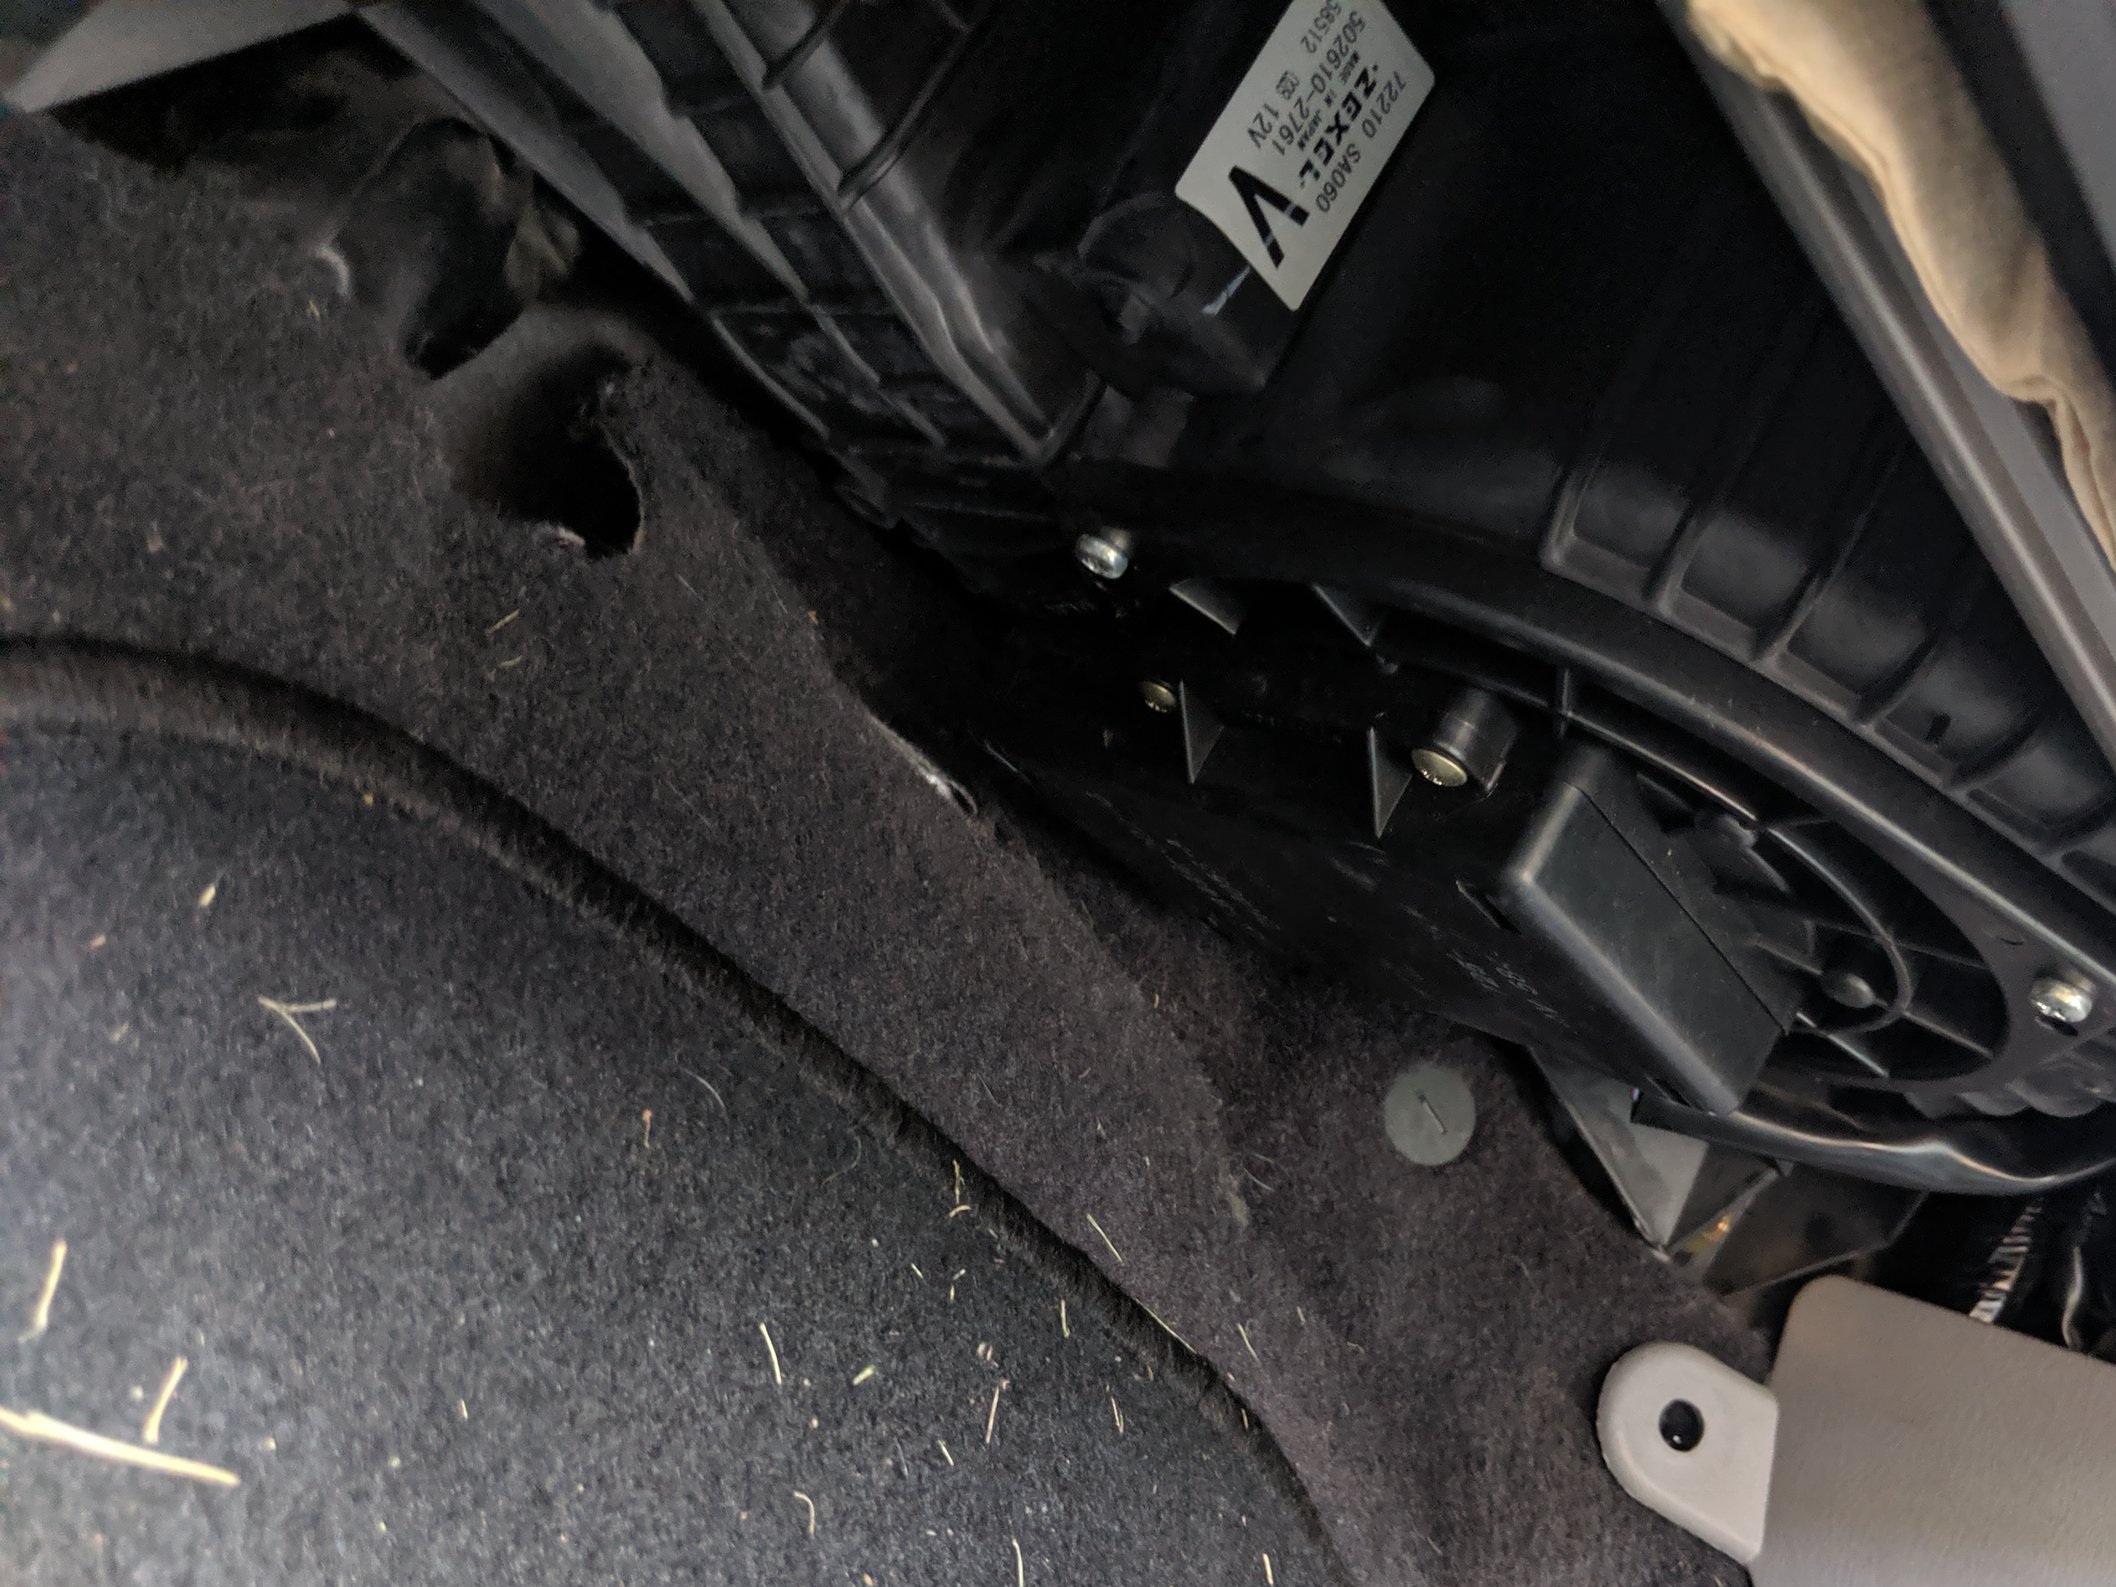
Lastly we will change the air settings and turn off the recirculate. Pop the hood and under your windshield wipers on the cowl there will be cutouts for incoming air. Now spray the remainder of the can into the cowl opening. Allow the car to run for another five minutes after you finish spraying.

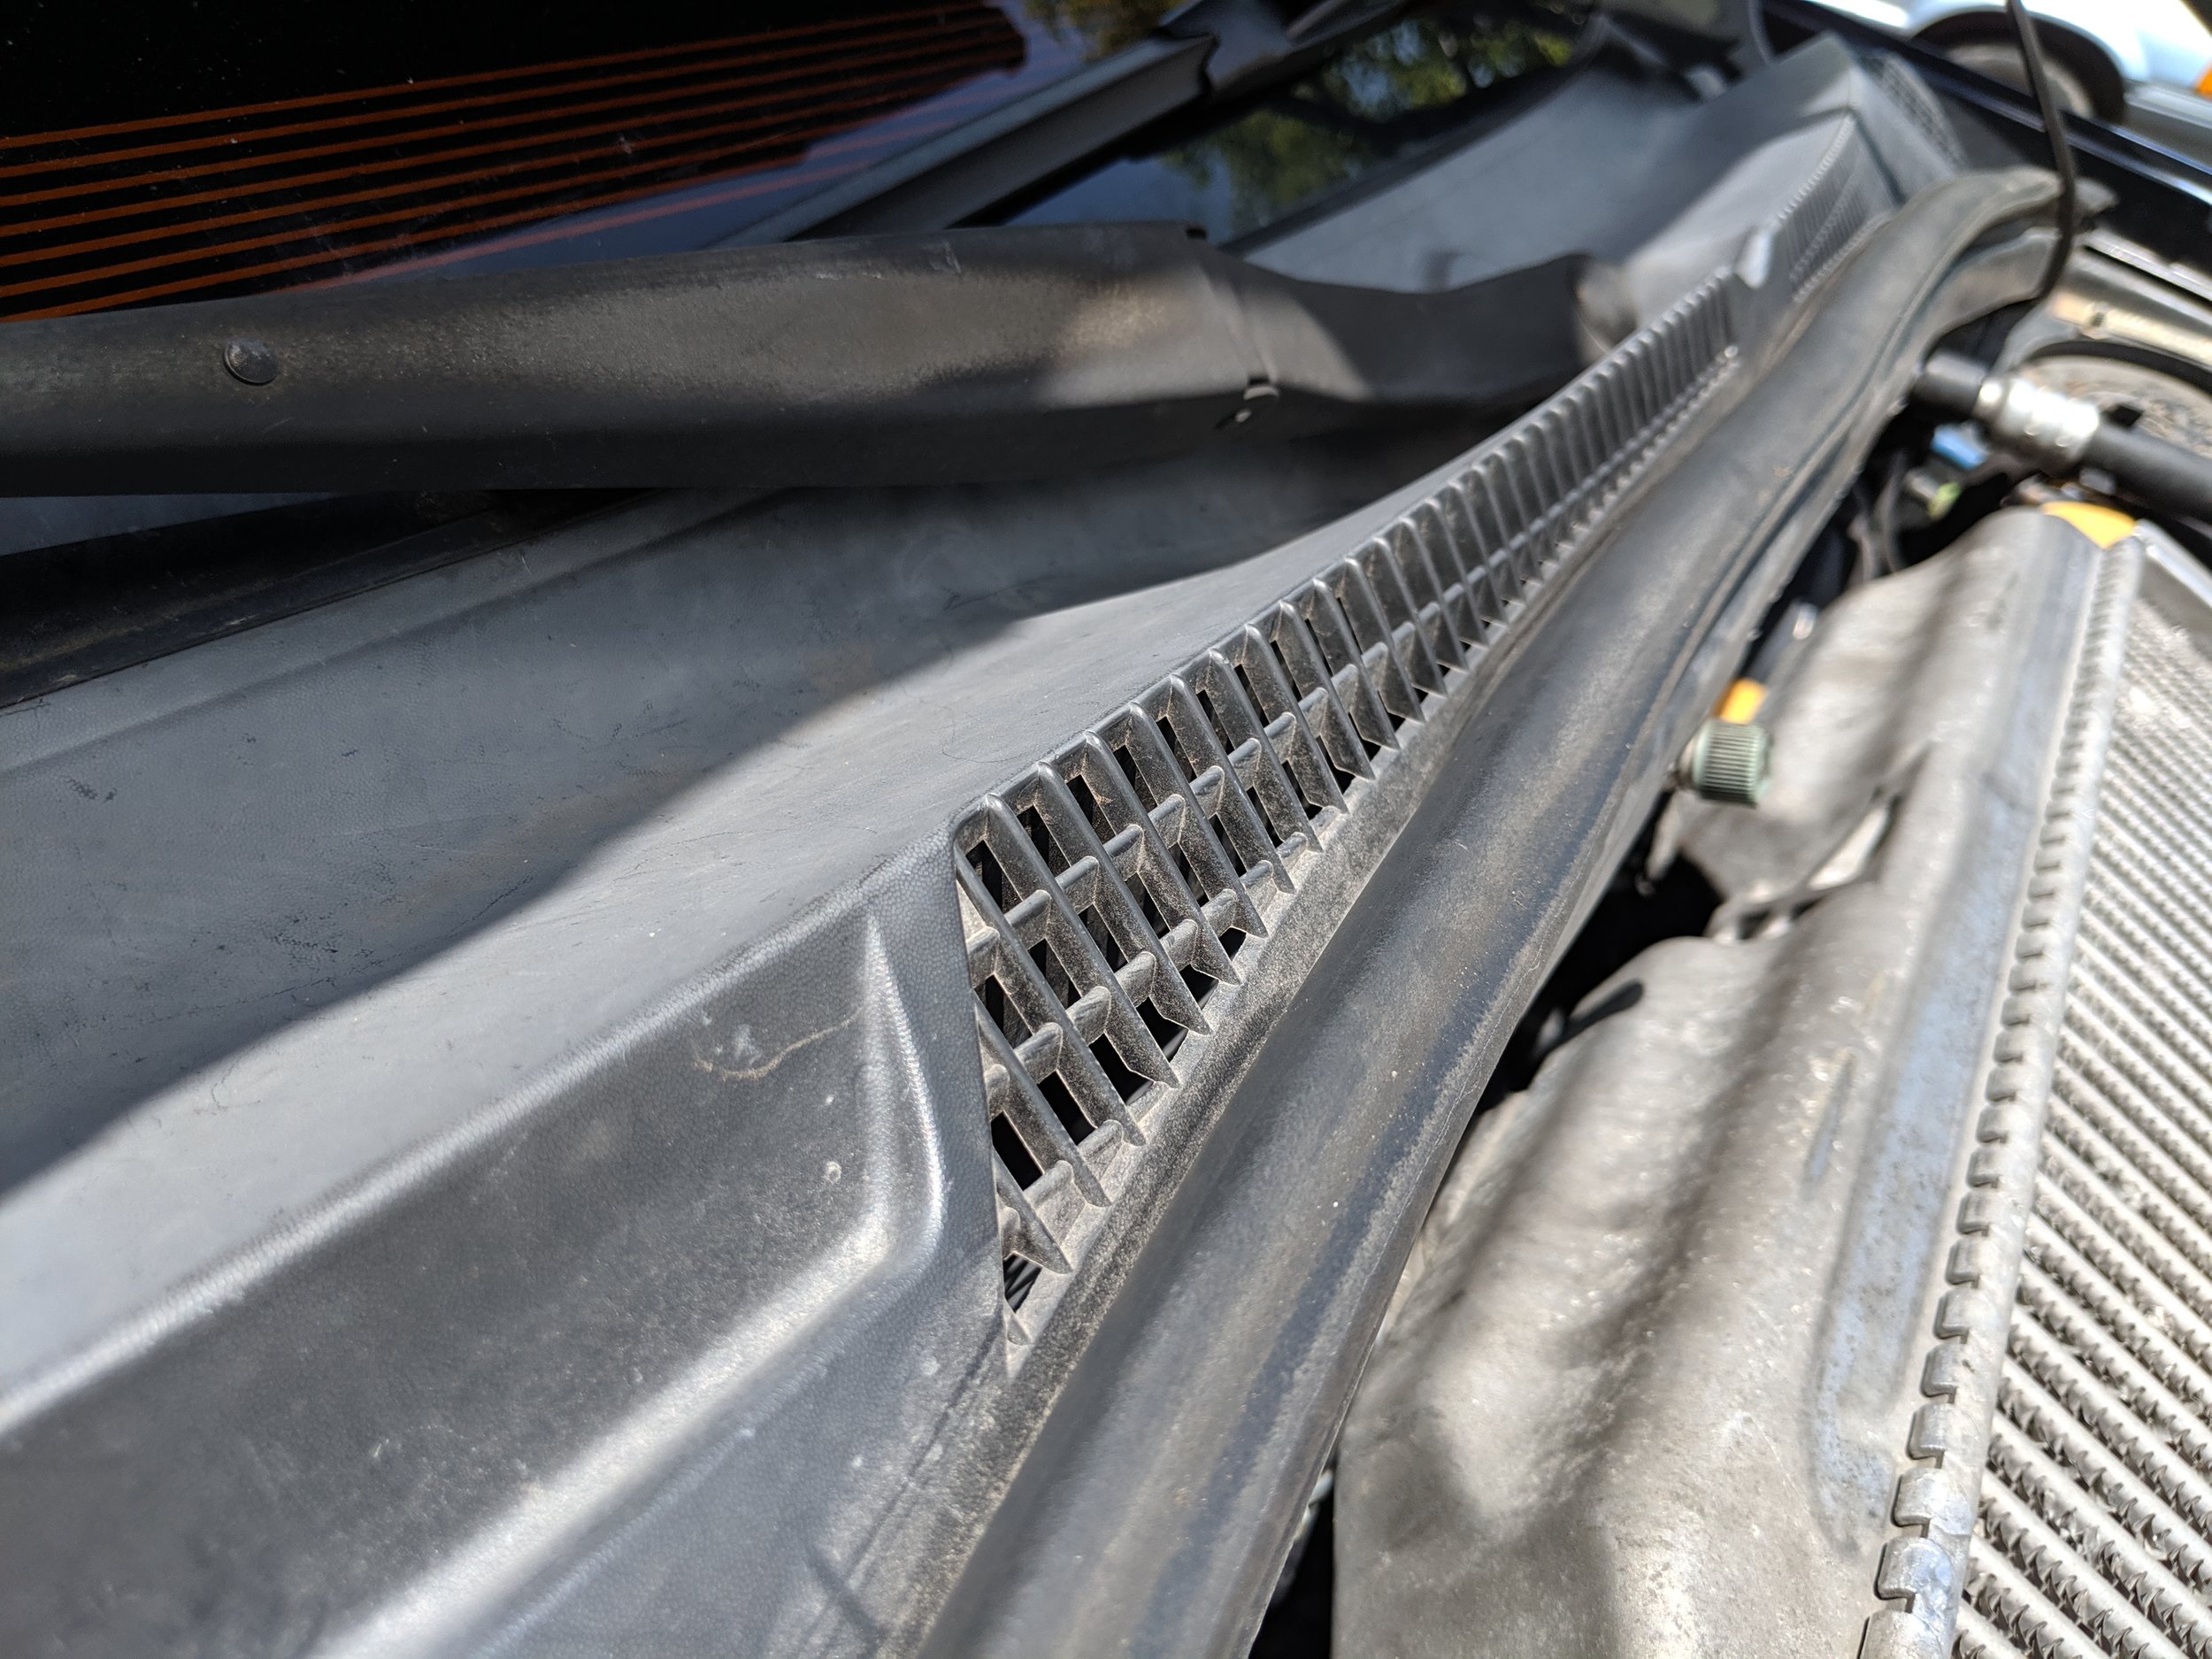
Here is the fresh air intake location. We will spray the remainder of the can down here and be good to go!
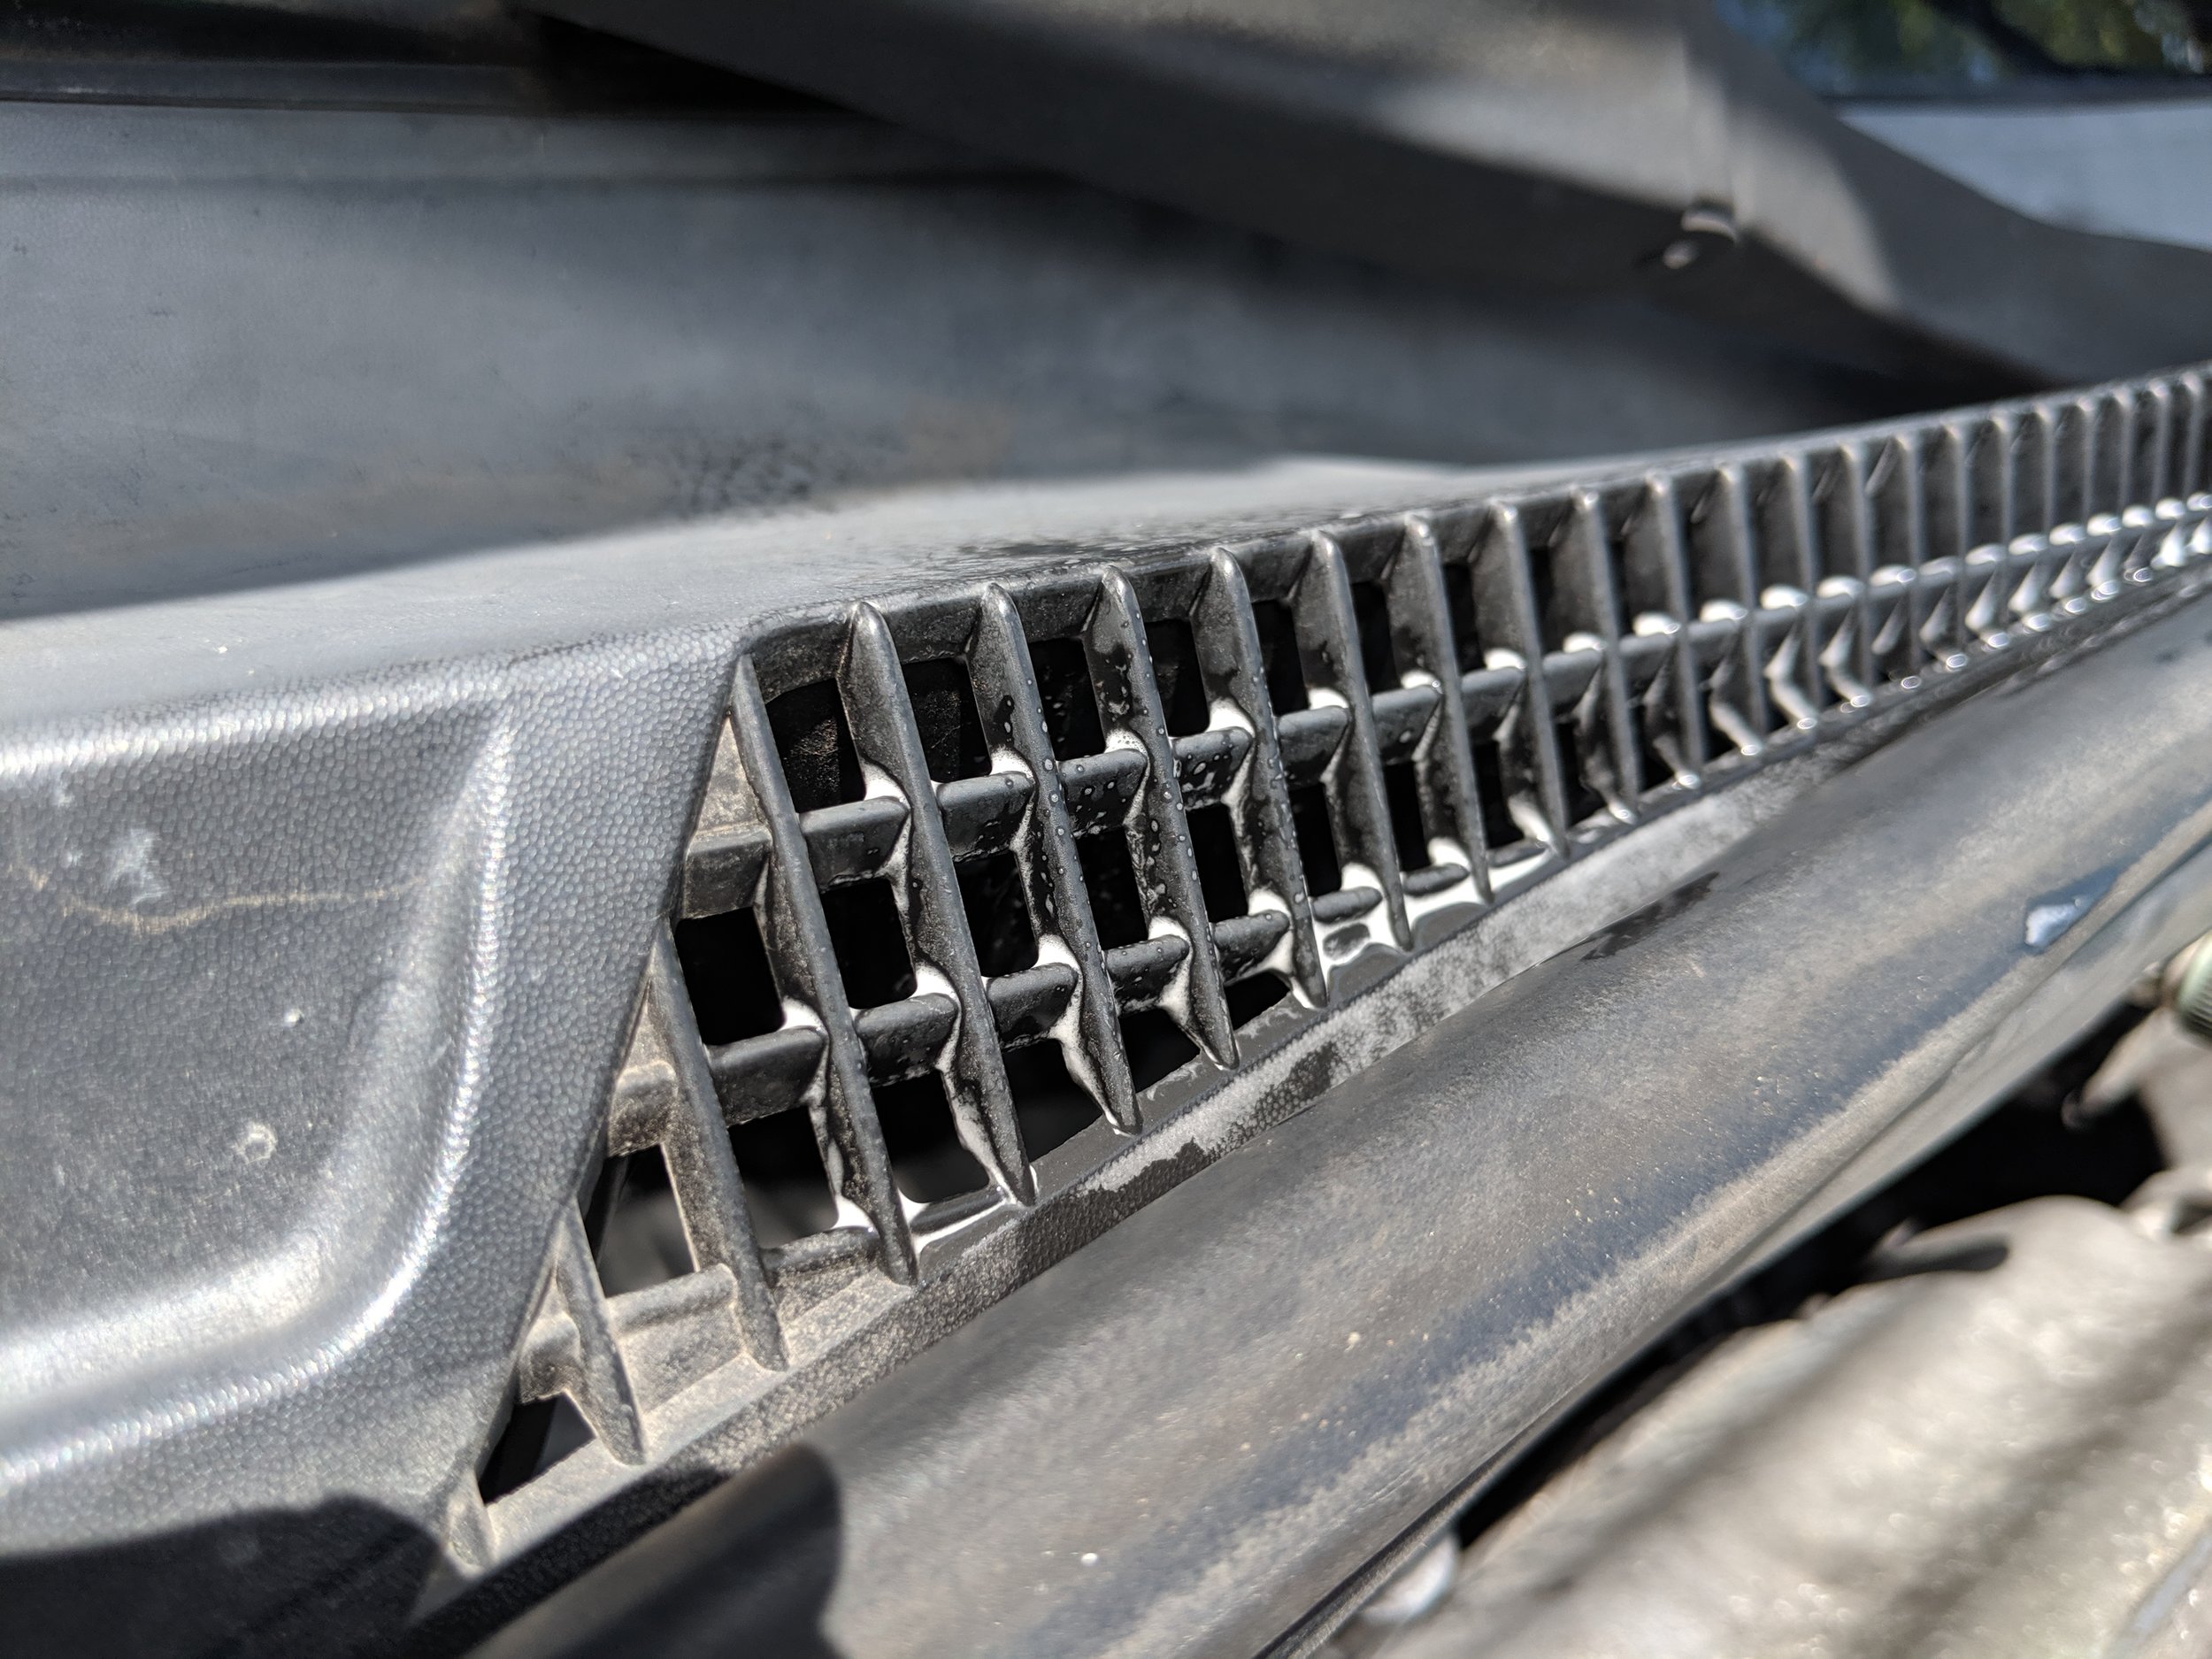
Here is what you will looking at afterwards.The doors will be closed and allow it to run for another five minutes to get it through the system.
To complete our cleaning you will turn off the car and roll down the windows. Letting the vehicle vent out for another 10 and then you can resume to driving it!
Congratulation! You can now enjoy your A/c even more with a nice refreshing smell to it and be rid of those unwanted smells.
Amazon links:
3 pack Clean air duct freshner
Denso cabin filter 03-08 Forester