Subaru front axle seal replacement! No need for more leaks, the media has plenty..
With all the leaks out there from newest tech devices, Liveleaks and various other media stories, let’s try to keep our Subarus from doing the same, i.e leaking all over the place. With four axles on every Subaru, except the Brz and older fwd Subarus, you have quite a few chances to end up with a leaky seal.
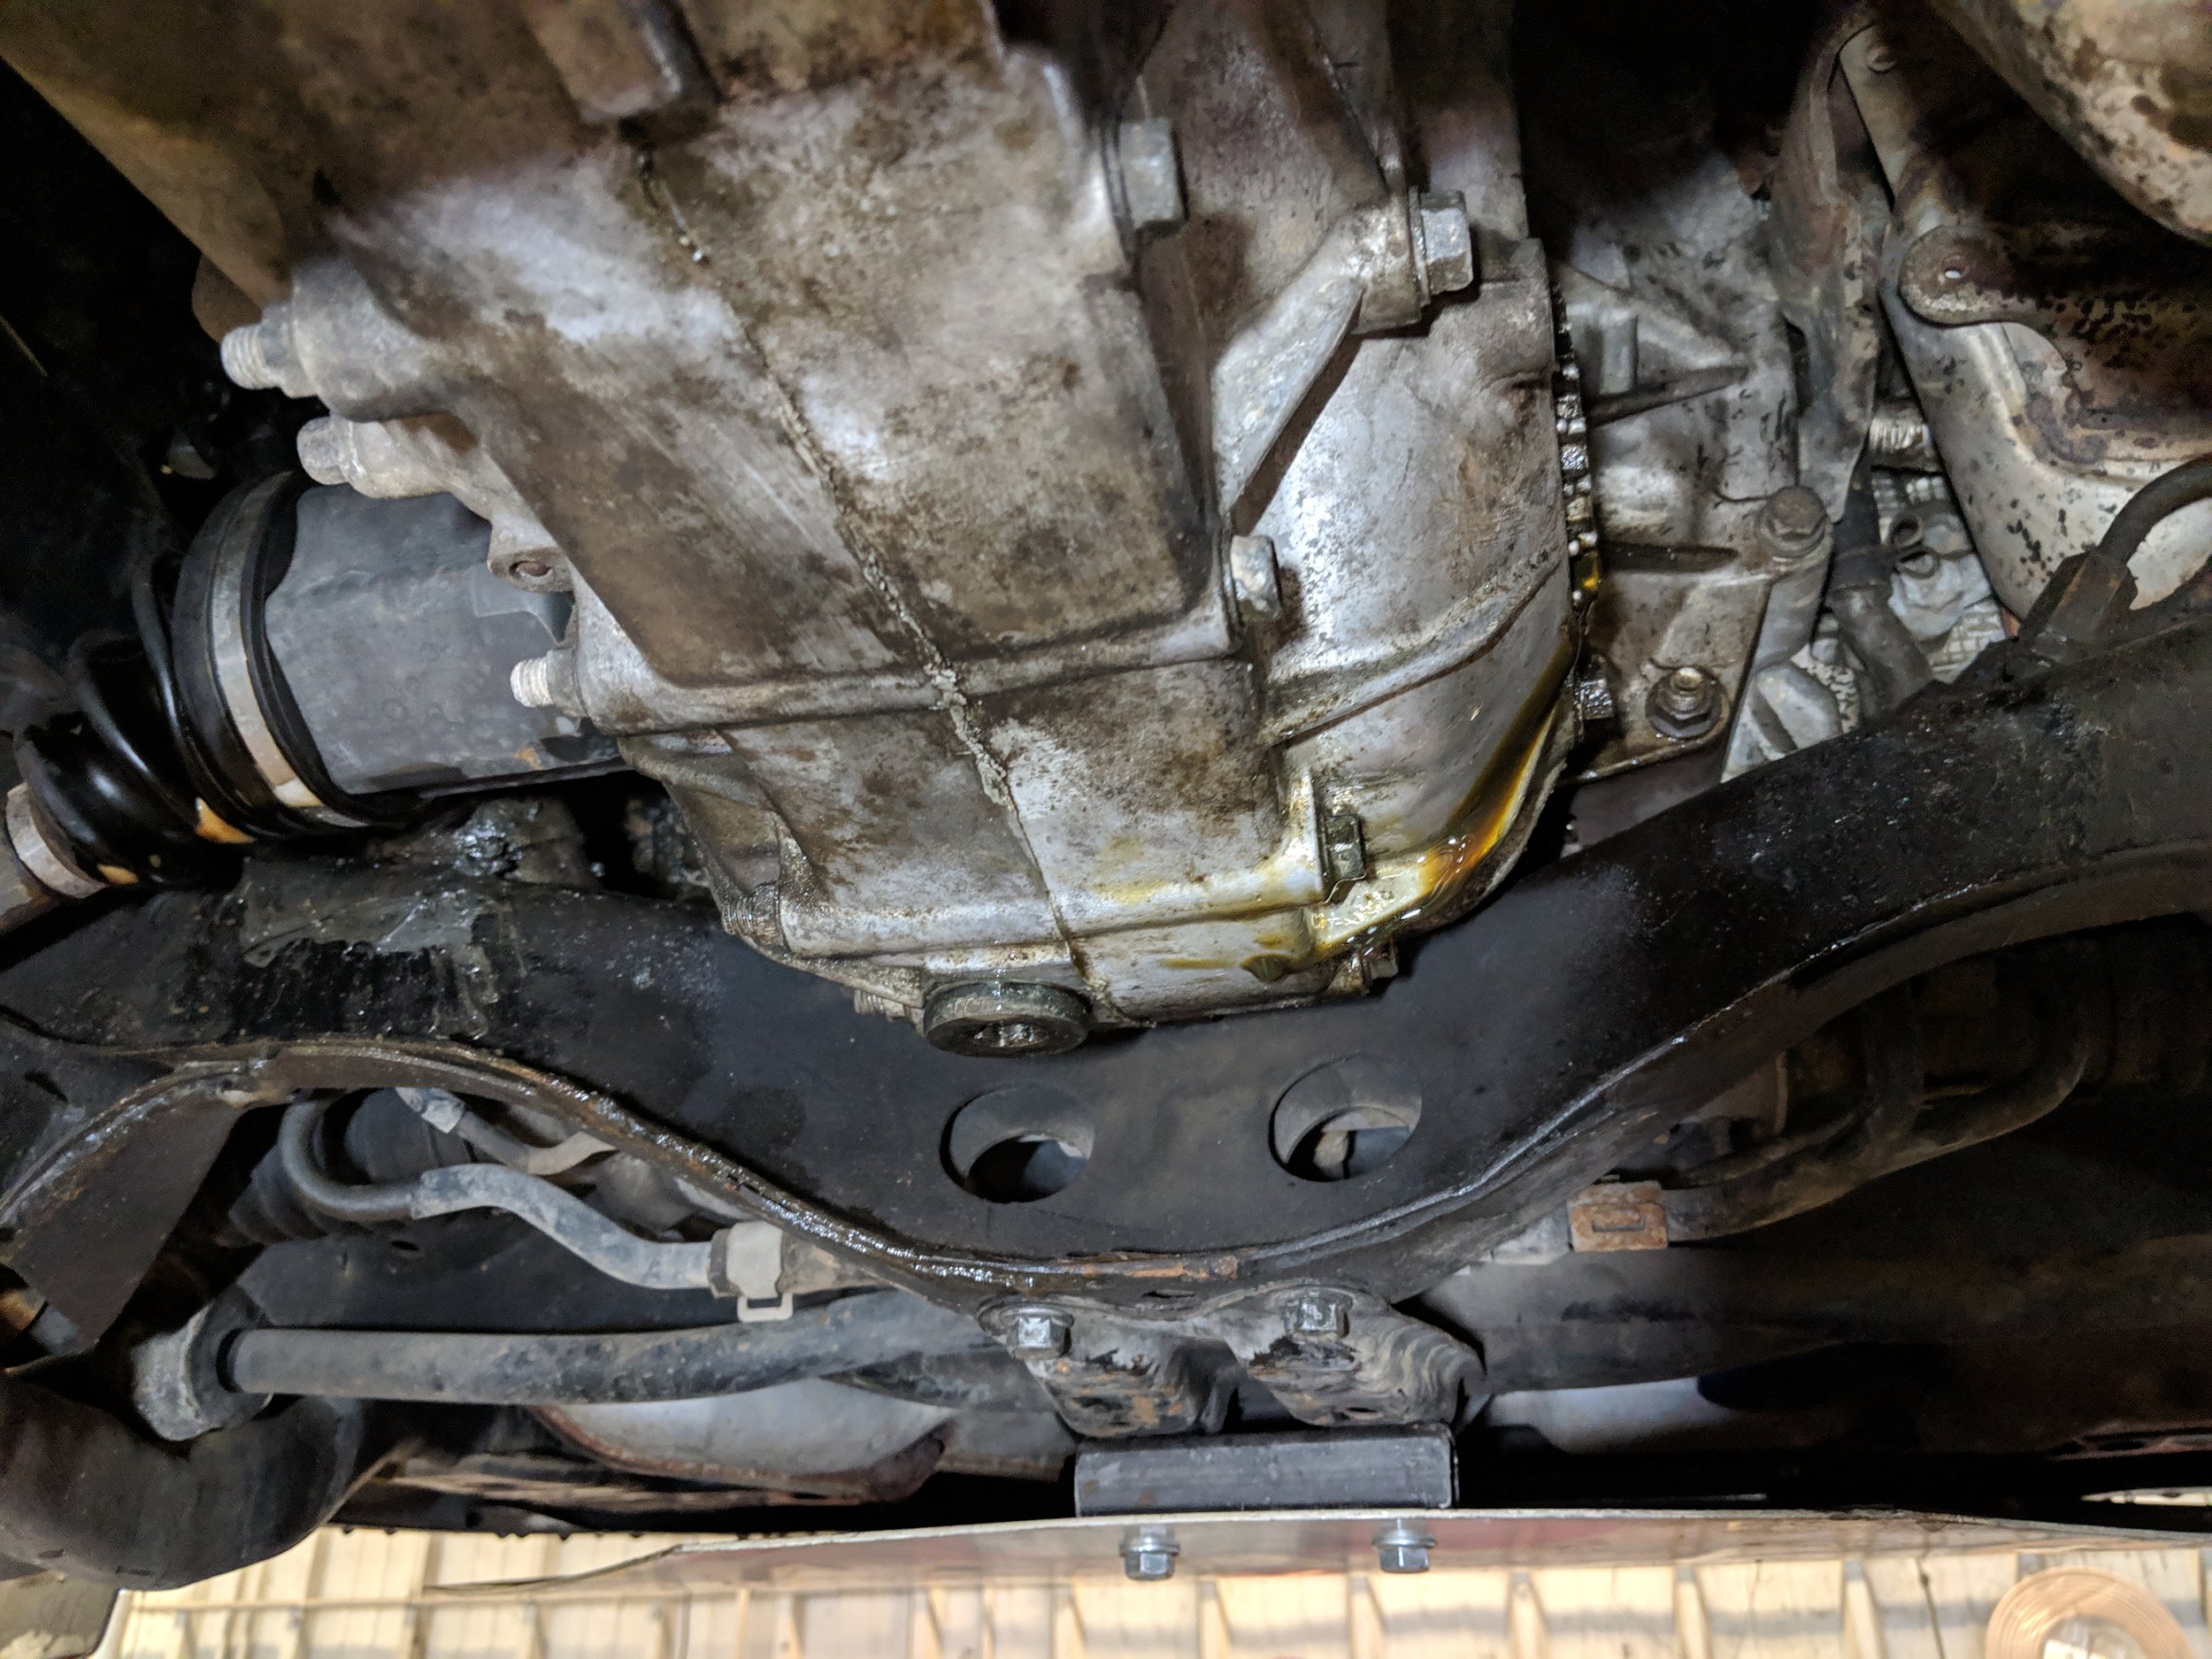
The signs of the a leaky seal are pretty straightforward with a burning smell on the as the fluid splatters the exhaust. A low level on the differential dip stick and lastly a spot on the driveway. With these clues you can track down the location of the leak and prepare your plan of action.
This is the typical location you will see leaks from. As gravity takes hold and and rolls down the transmission.
What happens to cause this issue? If you overfill the diff it can overwhelm the seal and cause a leak. When replacing Cv axles you can drag it across the seal and tear it or a poorly designed Cv axle can have rough spots where the seal rides can become worn and allow fluid to bypass.
Time
This repair can take upwards of a an hour or two, With the right tools and practice this takes me around thirty minutes. Once again rust and the previous time all these parts have been removed will have the largest effect on your completion time. If things are rusty and seized the time can start to add up quickly.
Tools
Our typical array of tools will be on this list with a few specialty tools
Grey Pneumatic 3/8th socket set: These will start off the list. You will need your 12, 14, 17 and 19mm sockets will help get this job going.
Grey Pneumatic 3/8th socket set: These will start off the list. You will need your 12, 14, 17 and 19mm sockets will help get this job going.
Gearwrench 3/8ths ratchet Milwaukee 3/8ths electric ratchet Milwaukee 3/8ths impact gun Grey pnuematic wobble socket set A few of my favorites right here.
Mayhew 5 piece pry bar set.. Helping you pop that pesky axle out of the diff. These are also great to have around for many jobs.
Oem tools front axle puller. If the pry bars can’t get the task done, this is another option. I have used these with excellent results. Allows you to use a slide hammer set to utilize this tool. GEARWRENCH 41700D 10 Way Slide Hammer Puller Set
This gearwrench slide hammer set will get it done.
Hammer(s). It’s hammer time, hub bearings usually don’t just fall out, this will give it the persuasion that is necessary. Proto antivibe hammer is my choice hammer. A deadblow hammer is very helpful to put the cv axle back into the diff, as the c clip needs a bit of suggestion to seat in properly.. Atd deadblow hammer set.
Hammer time!
32mm axle nut socket. Without this big boy you aren’t getting anywhere. This is needed to pop that axle nut off.
Powerbuilt seal driver/installer set. There are many things that can be substituted for these seals but having a set makes many jobs easier and less frustrated.
Lisle seal puller. With the right tool a job becomes that much easier. This guy should take care of this job no problem. Can be used for many other seals you may want to replace.
Parts
Today we will be working on a Subaru 5 speed manual but these also fit the Subaru 6 speed trans too. The driver’s side seal part number is 806735290
Driver’s side!
If you are looking for the passenger side, part number is 806735300.
Or if you would like a set for both sides. Subaru transmission seal kit.
Install
With the vehicle lifted and supported properly we can begin with removing the wheel. The next steps will be to remove the axle, we can start with the axle nut (32mm socket) and then move to the lower strut mount.
Axle nut loose onward we go.
At this time you can choose whether to remove the ball joint nut or bolt that holds the lower ball joint in to the knuckle to swing it away from the car. I prefer the lower strut bolts as they generally are easier(I also have an alignment rack at my disposal) to do but either technique works, we will showcase both methods. You will need to mark the upper strut bolt if you choose to remove it from there, I’ve had great luck marking them and rechecking my alignment.
Removing the lower ball joint is the other method to pull the axle shaft out.
Now we can mark the upper cam bolt before proceeding with the removal of the strut bolts. Both of these are 19mm and once removed the strut and knuckle may attempt to separate. If not you can use a small pry bar or screwdriver to pull the knuckle towards the outside of the car.
Mark the upper cam bolt, this will help keep your alignment close, if not dead on post install.
The two strut bolts need to come out. The upper strut bolt is the camber bolt.
If your vehicle is equipped with Abs you will need to remove it from the strut, the same is true about the brake line.
Abs clip or bolt determined by your vehicle. Disconnect this.
Remove this bolt to free the brake line. This will give the knuckle more movement.
Having the knuckle separated from the strut will now allow the axle to be removed from the hub. You may find that you need to apply downward pressure on the lower control to allow the axle to free itself. Once it is free find a safe place for the outer boot to rest.
Axle getting ready to be removed as the knuckle is undone.
Another angle. You may need a punch to help move the axle out of the housing.
We will now work our way to the transmission/differential to remove the axle. There is a c-clip on the axle stub at holds it in place, we need to apply enough force to pop that out. The most basic removal method is using a pry bar on the cup to knock it free or prying against the diff and axle to pop it free. Another specialty tool for it i a large C shaped adapter for a slide hammer. I reserve that tool to the very stubborn axles.
With a pry bar wedged in between the trans and cv axle you can generally pop it out with a light tap of a hammer.
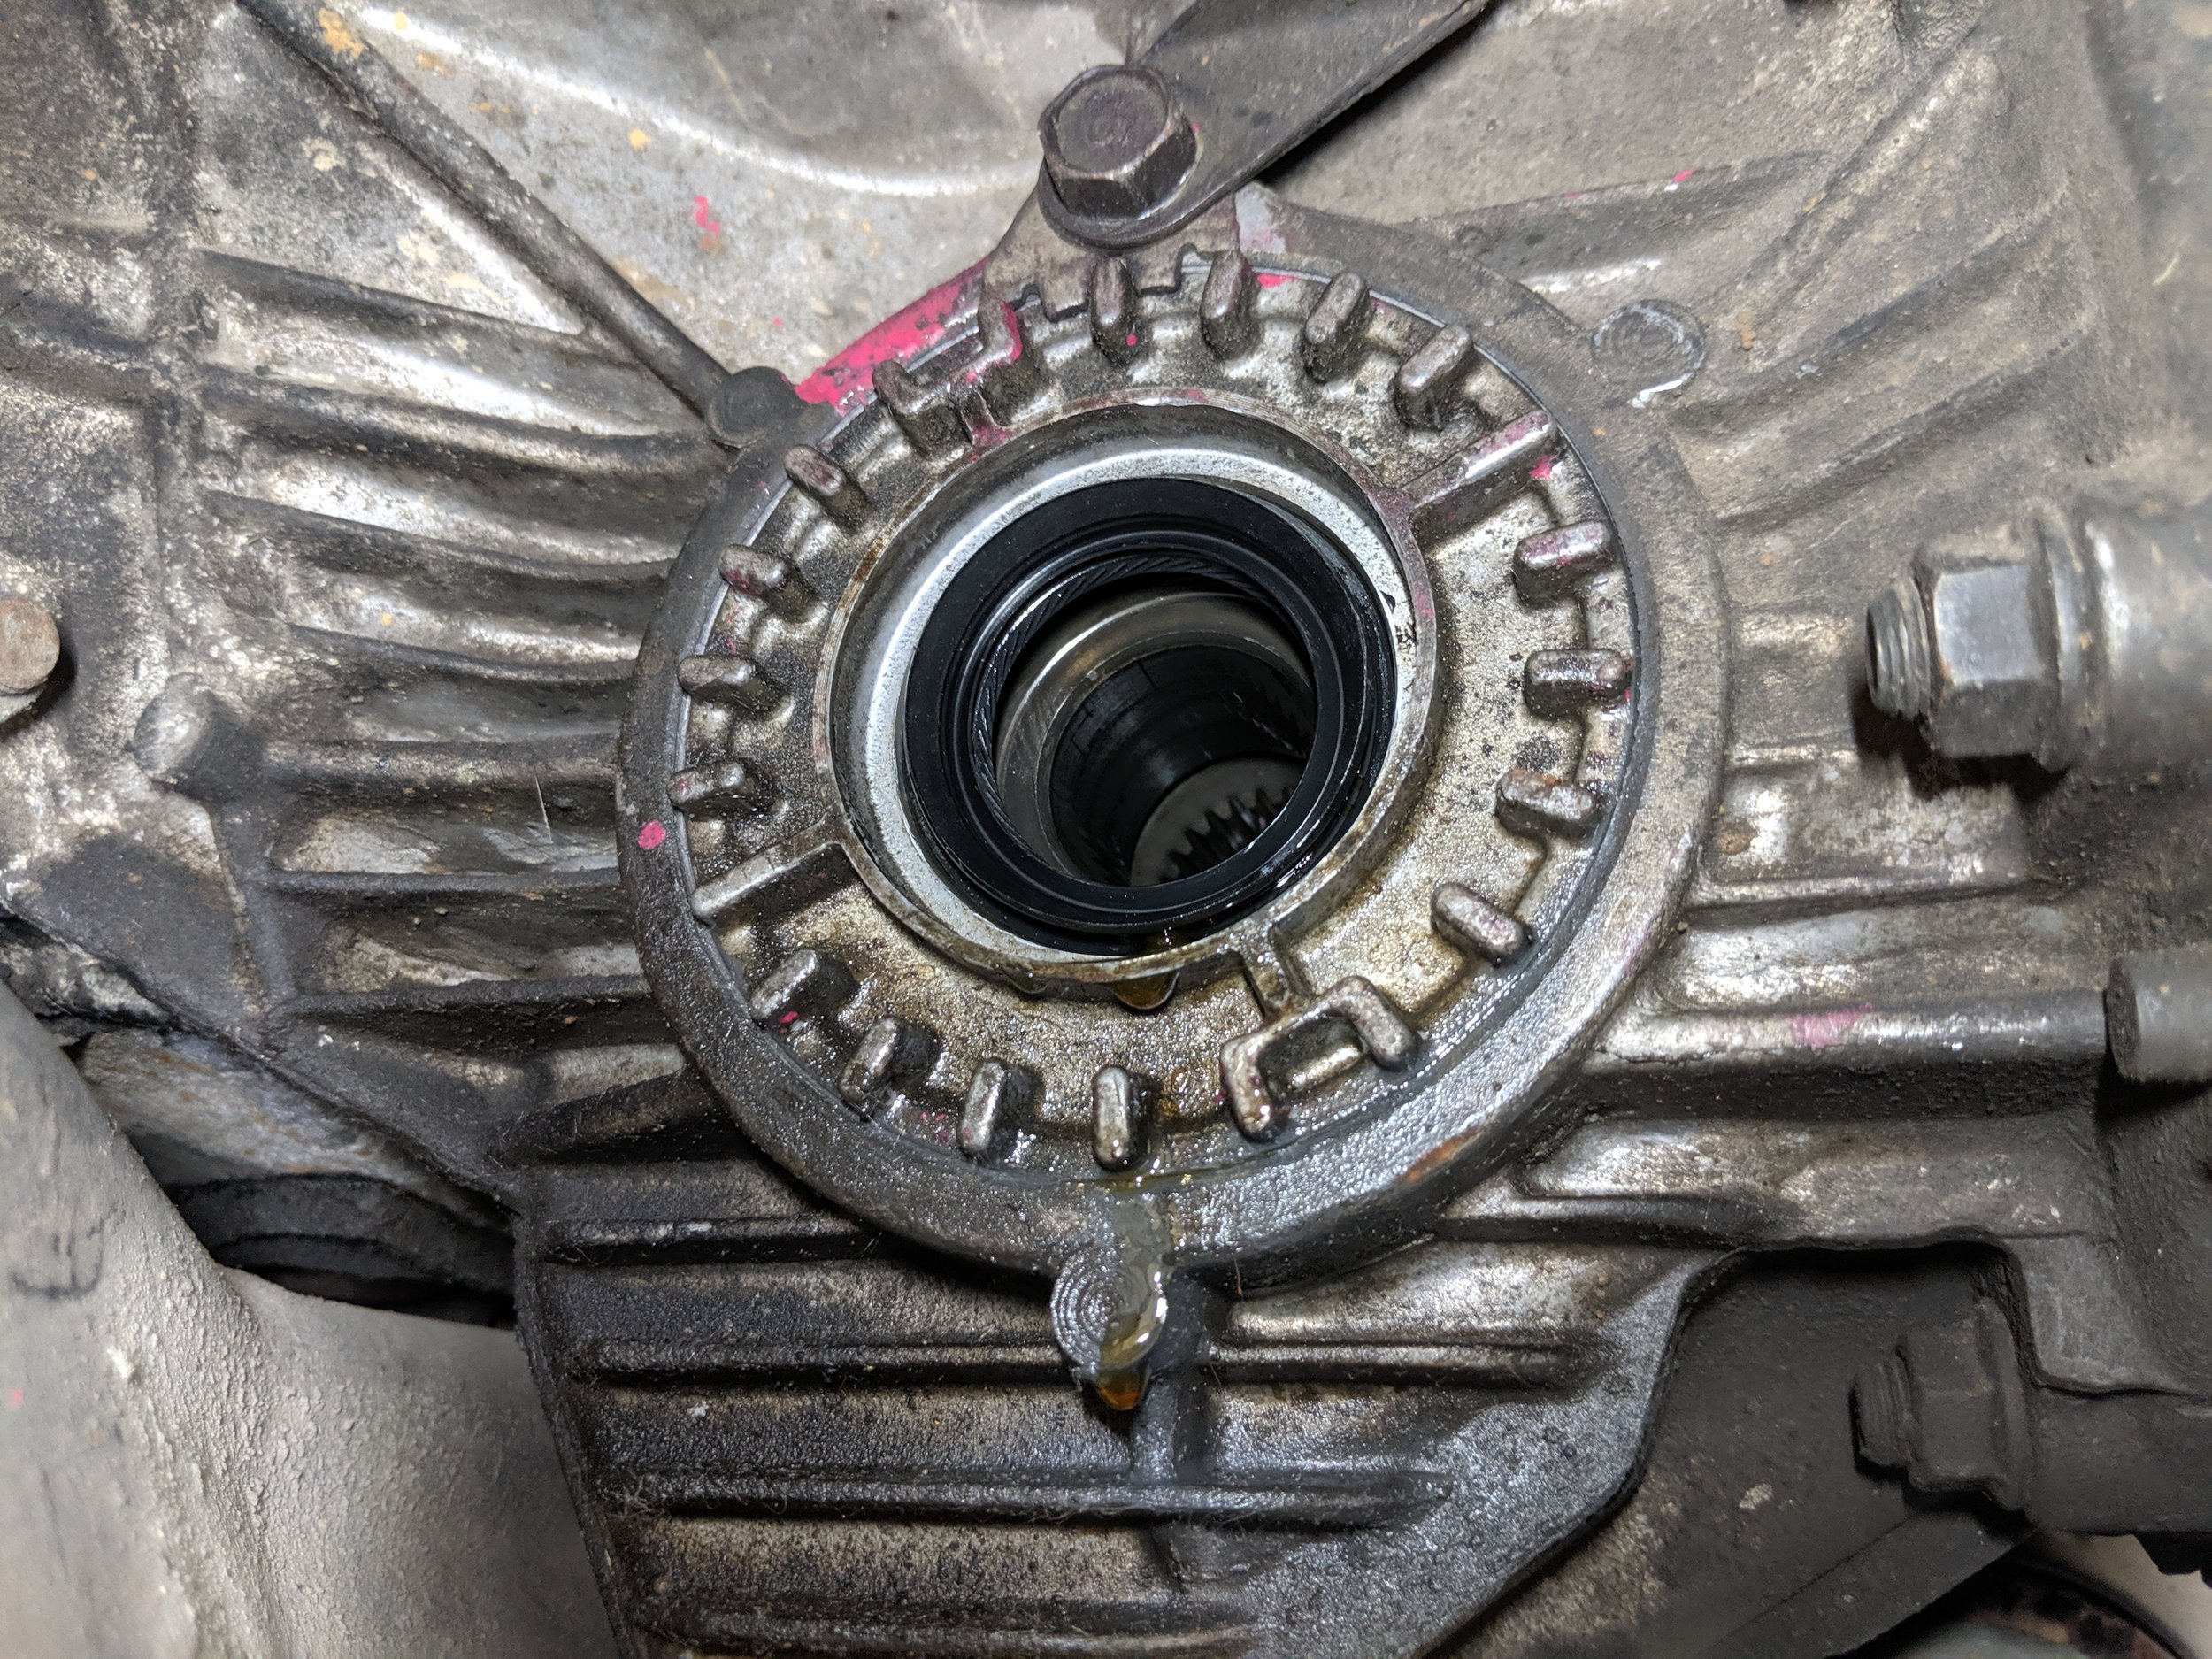
You may want to set a drip pan down before removing your axle, it is common to have a bit that flows over the seal and out. Having removed all of your obstacles and parts you can now pull out the axle seal. Subaru does have a different seal for each side, so make sure you have the proper side before tearing your old seal out. Once again there are many specialty style tools for this, I have used a standard seal puller but have also had good luck with a very small pry bar or large screwdriver. Taping off the tip of the utensil will protect the area where the seal sits. Damaging this area could easily cause a leak after your fix, and nobody wants that.
Leaky seal… Ready to be removed.
A quick note, you can also remove the entire seal area referred to as the differential Sundial bearing carrier. Thought this actually unloads the differential, which if you aren’t how to apply the proper preload to it, this should be avoided. Many will mark the sundial and transmission and then count the turns, I have never used this procedure but it is an option.
This is the sundial, the single bolt at the top of the sundial. You must mark it and count the turns if you remove it. Once again, I do not utilize this method as it unloads the front differential. If you do not put the dial back where it precisely was, it can cause noise and damage to the front diff.
With the seal removed you will most likely have more fluid dripping out. When the fluid stops leaking we can clean the seal area for a proper seal of the new unit. It is also a great time to clean the surrounding area to be able to verify the seal isn’t leaking again. Given which side you are replacing you will need a seal driver kit or an object that is the same inner diameter of the seal but a slightly larger out diameter to keep it from being knocked right into the diff. Apply a very light amount of oil to the exterior of the seal to help it slide in.
Looking through the seals, you need to find a seal driver is just slightly larger than the seal.
And we have a winner!
Our driver assembled we can now install the seal.
Having the right seal driver in hand we can softly tap and check our progress. The goal being a seal that sits flush with diff housing. When you are happy with your seal placement I like to take a bit of diff fluid from my pan and dampen up the inner seal where the cv axle slides in. This will help avoid tearing seal when installing.
New seal being installed. Run your finger along the edge of the seal to make sure it is evenly installed. Then clean up the area post install to make sure it isn’t leaking again.
Next up is putting the axle back in. Being careful to not nick or tear the new seal we will slide it into the diff. Once it is engaged we need to hold it as straight as possible and give it a good couple of taps with a rubber mallet/deadblow hammer. This will allow the c-clip to engage the transmission, holding everything in place.
Axle back in the differential. Give it a slight pull with your hand to make sure it is seated.
Completing those steps now brings you to backtracking your removal procedure. Replace the axle back into the hub and knuckle assembly. Then pushing the knuckle back into the strut and securing your abs and brake lines. Then applying a new axle nut and torquing it. Back on with the wheel and some further torquing. If you lost a lot of fluid, now would be the time to double check that fluid level on a very flat driveway, add if necessary. Then we bring the car back off the jack stands or lift and check that you are able to move back and forth.
Bolts back in, now install the nuts and run them down. Keeping your camber bolt lined up as your marked it.
Axle nut ran down, torqued and staked to keep it from rolling back out.
Congratz! You have completed a less than fun job of replacing an axle seal! If your vehicle is tall enough you can double check periodically to make sure the seal has sealed.
Amazon Part Links
Subaru driver’s side seal 806735290
Subaru Passenger’s side seal 806735300.
. Subaru transmission seal kit. Both sides
Amazon Tool Links
Grey Pneumatic 3/8th socket set
Milwaukee 3/8ths electric ratchet
Grey pnuematic wobble socket set
Lisle seal puller.
Atd deadblow hammer set
GEARWRENCH 41700D 10 Way Slide Hammer Puller Set
Powerbuilt seal driver/installer set.


