2004-2005 DCCD plate replacement! A metal cylinder full of witchcraft?
When the STi was announced the “Driver’s controlled center differential” really made enthusiasts take note and search for further information on what it actually did. Well what does it do..It is the device that makes all wheel drive happen, without it power transfer front and rear wouldn’t be possible. In automatic mode it allows the DCCD module to take data from a list of sensors and decide if sending a few electrons through the wiring and engaging/locking up the plates will make the driver look like a hero. It also gives you the ability to “lock” the center differential torque split up between the front and rear diffs.

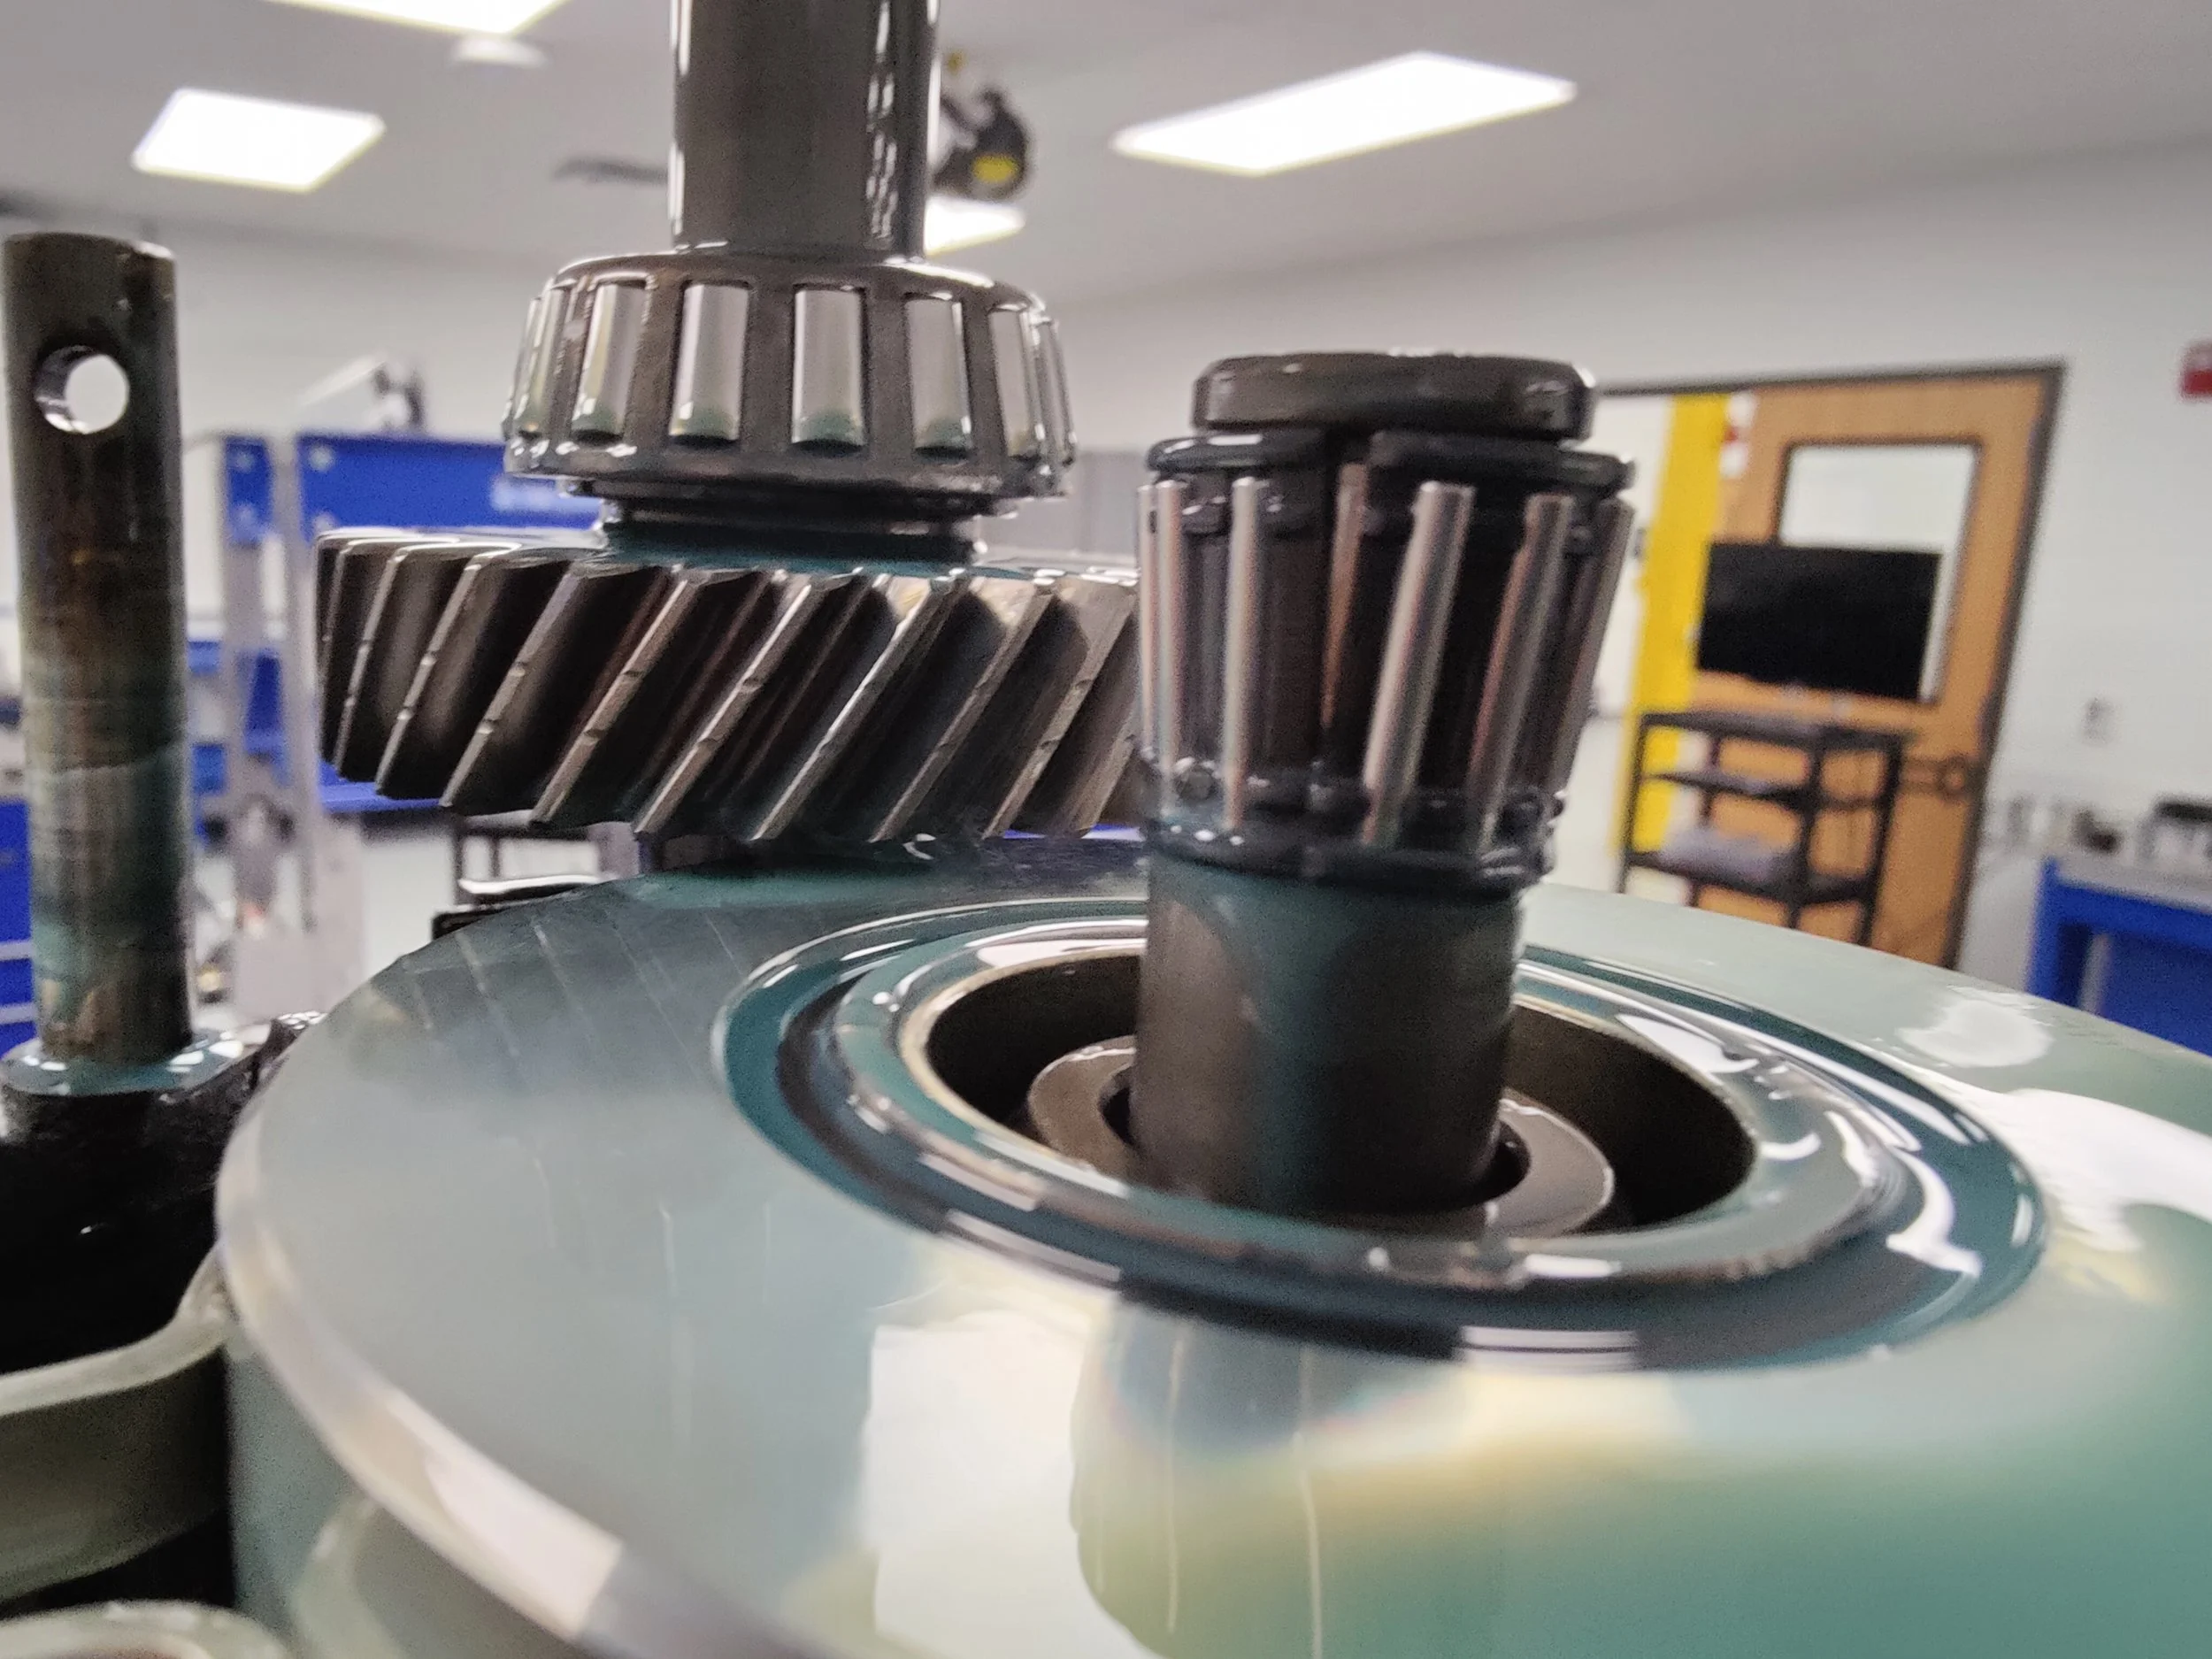
This is where the DCCD calls home, located in the tail housing splitting power between the front and rear axles.
While Subaru’s Six speed Sti transmission is well known for it’s reliability at double or triple the power it still isn’t impervious to damage. I have seen my share of videos showcasing a failed or worn out DCCD. What comes with this damage? A Dccd can cause power to be lost when it isn’t operating at full capacity. I have also been a shop and witnessed a STI with a damaged DCCD that was unable to transfer power rearward. So what can you fix in a DCCD… the plates is pretty much it and Subaru in the US doesn’t actually sell these. This leaves you ordering plates from Japan or Mooresport, so let’s find out what this is all about.
Time frame
How long should set aside for this job? This really comes down to how you are working on the transmission, do you have a lift, are you removing the transmission, or are you rolling around on a dirt floor. I'd set aside at least three to five hours with a car on a lift removing the tail housing, popping out the DCCD and putting it back together.
Tools
You will need plenty of hands tools, power tools can be helpful to speed everything up. Alongside the more typical tools you will want a few feeler gauges, pocket screwdriver and a few punches.


Parts
This category is pretty straight forward as the plates are the only part that can be purchased for this repair. Your choices come from whether you want to stay OEM or go with some aftermarket plates.

Mooresport on the left was my go to. I was not aware at the time you could order replacement Oem plates from Japan. Part numbers for these plates are MSISUB03-00-001 MSISUB03-00-002 check for proper fitment!

A little bit of difference between the Mooresport plate on the left and the oem units.
Installation
While the images will showcase a transmission that has been removed, you don't have to do that. You can easily lower the transmission from the rear mounts and remove the tail housing which gives you all the access you need.

What needs to be done before you gain this access, first up you should drain the transmission. Then remove the downpipe and any other exhaust that is in your way.
You can move to the rear differential cover that protects the driveshaft and diff. To remove the driveshaft you will want to remove the four bolts and nuts that connect the driveshaft and differential. Now you can move towards the transmission and remove the center housing support bolts and slide the driveshaft out.
You will need to remove the shift linkage bushing, linkage pin and reverse cable. Using a bungee strap you can hold it off to the side and out of your way.

Not all the necessary images are here but this is where you are heading. I would add another support to keep the transmission well supported.
Our next task is supporting the transmission so you can remove the mount. If you are working on jackstands a two x four can be a nice cushion in between a jack. After you have it supported can remove the rear four bolts that hold the mount in. Now you should be able to lower the transmission down to access all the tail housing bolts.
You might want to spray your extension housing dowels with rust penetrant to help remove it easier. With those soaking you can go ahead and start removing the bolt after bolt.

If you have the transmission out of the car this is a bit easier, but not super easy.

Bolts ready for removal.

Off with the extension housing and now we can get the DCCD out
With all the bolts removed lets go ahead and remove the extension housing. Hopefully the transfer driven shaft comes with it and doesn’t try and fall on your or precariously hang from the transmission.

This should be your next view, we need to complete a few more steps before pulling the DCCD free.
Now you should be able to see the DCCD, I would recommend removing the needle bearings that sit just past the DCCD and setting them to the side. Next up you can disconnect the DCCD connector and it will be ready to slide out. Be wary as there is another set of split needle bearings in the middle of the DCCD. Place them together but don’t mix them up, they should return to the place they came from.
Make sure to store those needle bearings somewhere safe and remember where they came from!

Disconnect the plug and the DCCD will be ready to come out of the transmission.

Freedom!
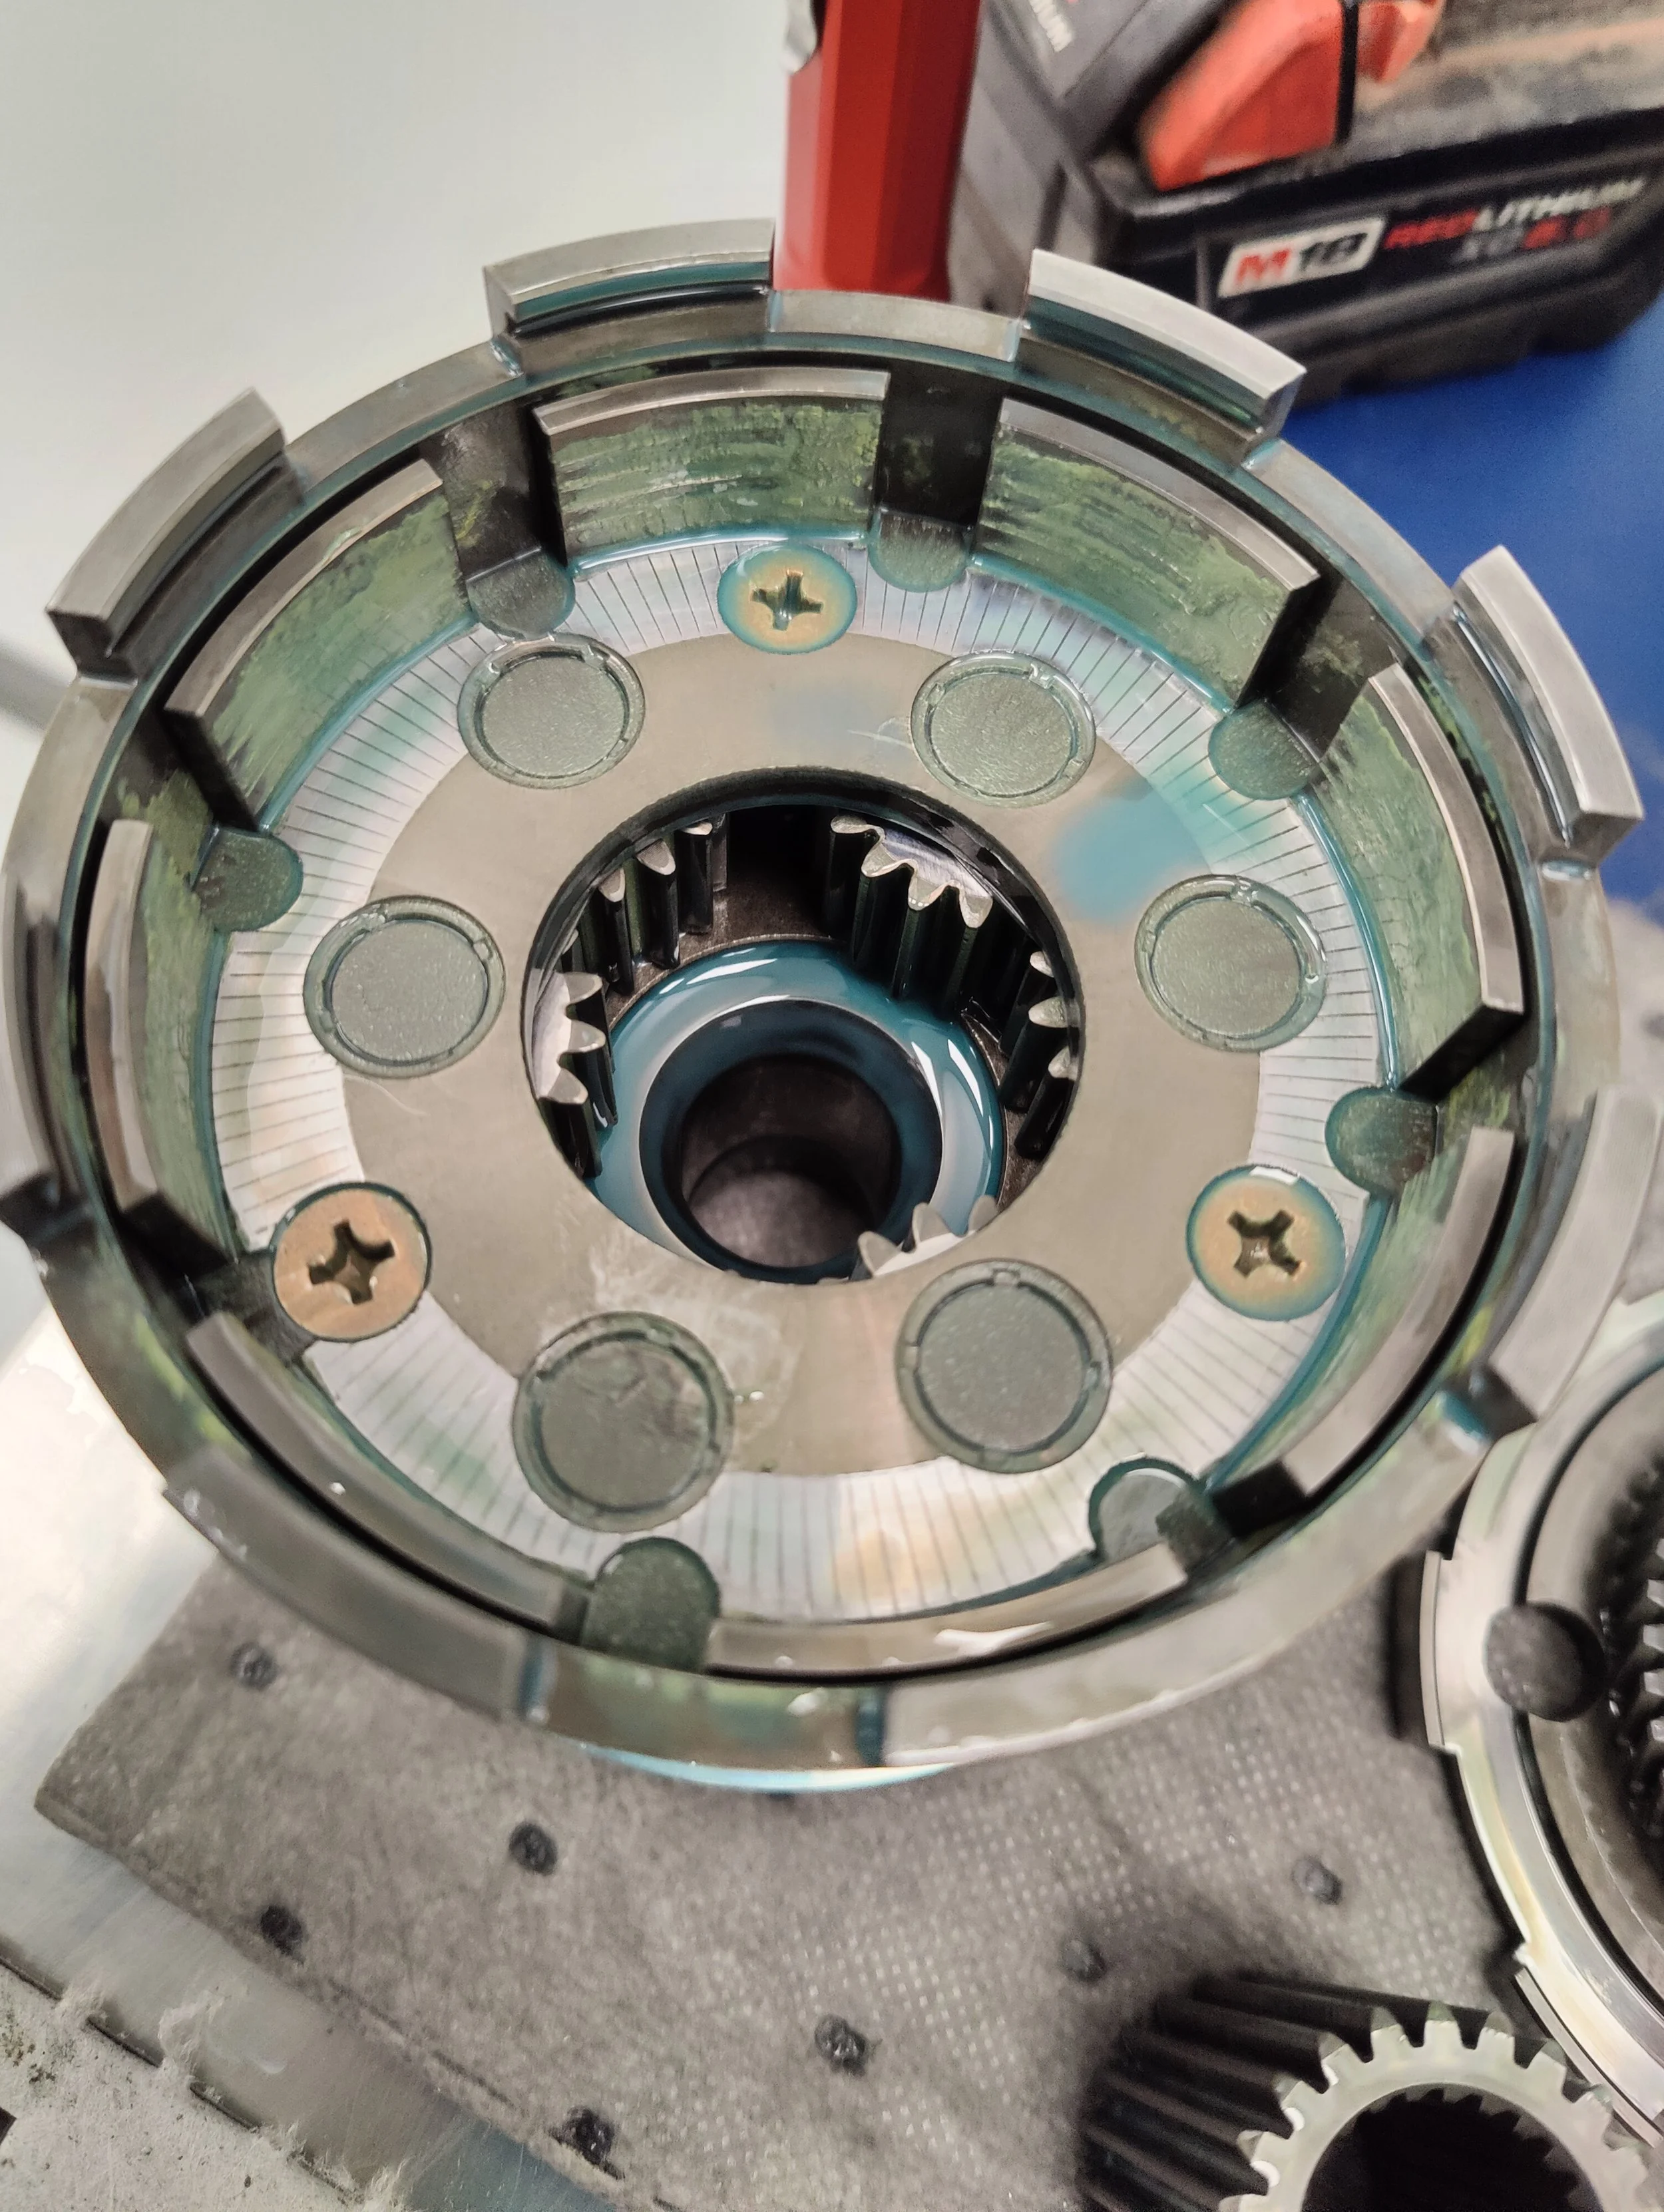
You can now stare down the DCCD and decide when its time to crack it open. If you are curious of the wear on your plates you can measure underneath of the top of the case to the snap ring.

Now it is time to get those plates replaced.

This would be where you would measure

Starting to peel it on open.
With this complete you may now remove the snap ring, making sure to wear proper eye protection. After it is removed you can pull the top straight up and off. You will now see a washer and it is time to start removing plates. I would highly recommend stacking them in order just in case you stop in the middle or get distracted. It is not hard to reorientate but better safe than sorry.

Cap is off and sometimes the washer comes with it.

Otherwise this is where the washer sits.

After washer is removed you will see the plates

Just keep removing them in order.

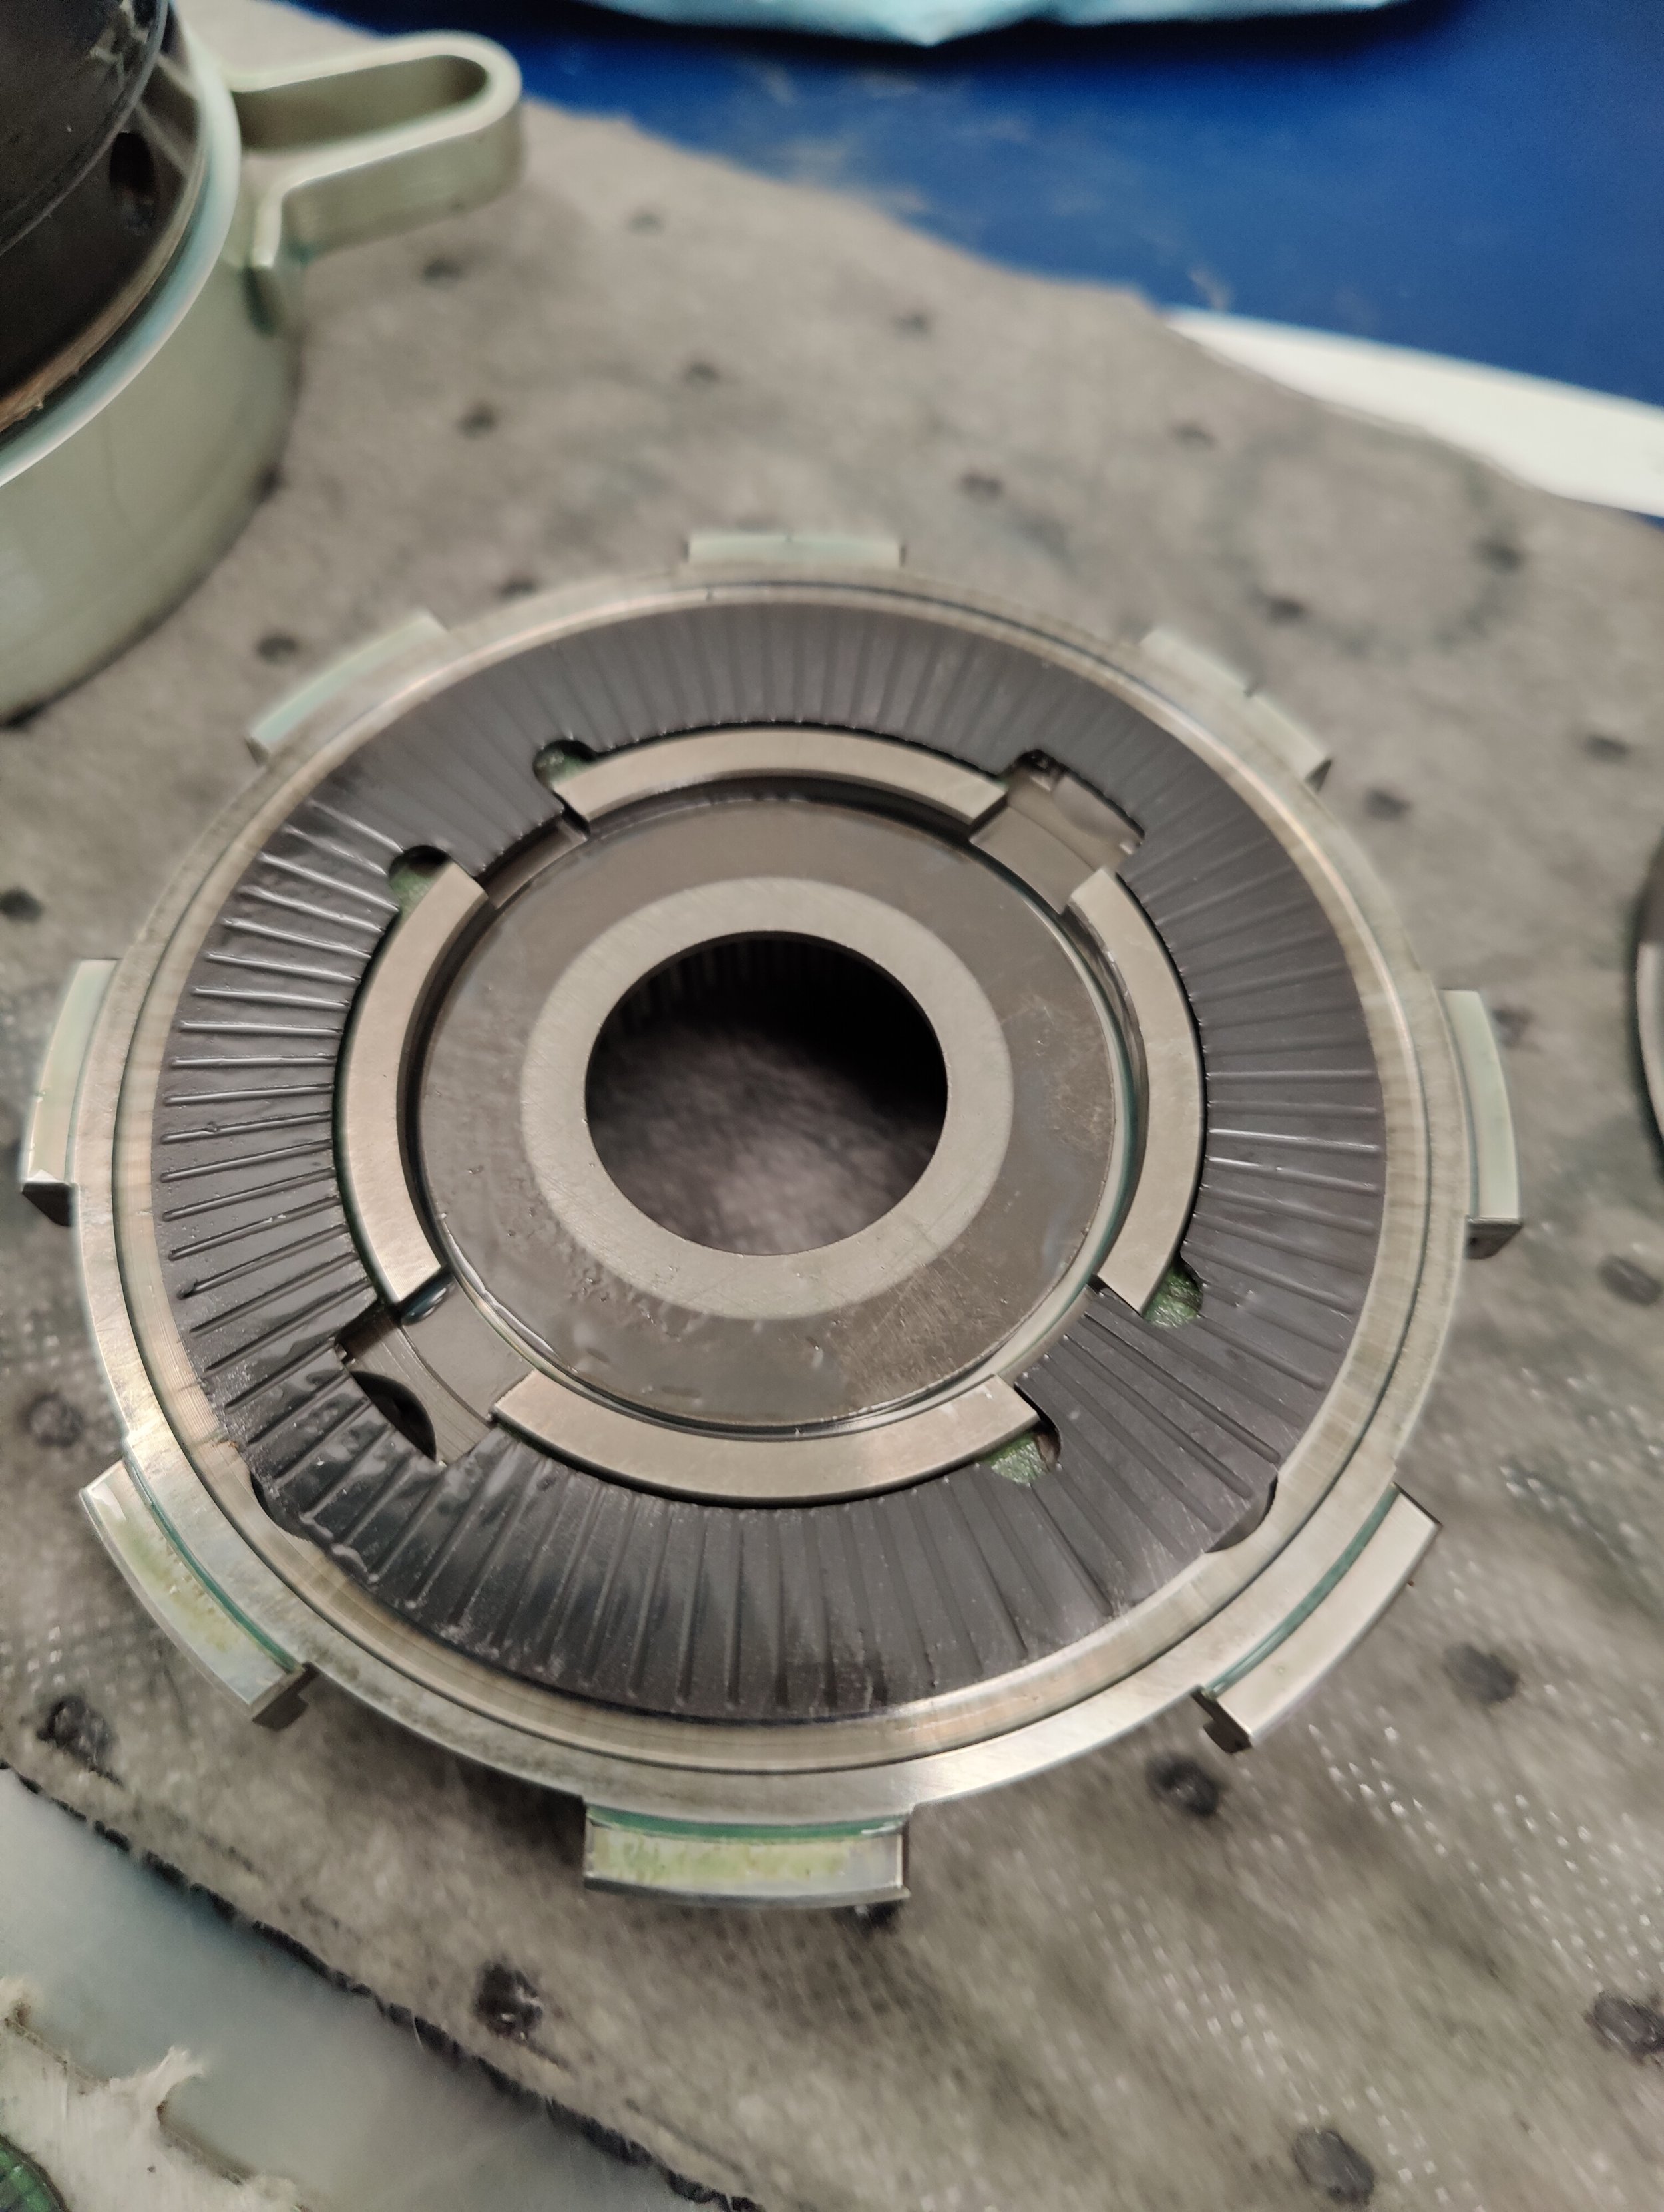
All the plates have been removed.

This what you will see after the plates have been removed.
You can certainly go deeper into the rest of the DCCD but there isn’t really anything we can replace. But if you would like to examine it all feel free, just stack it so your remember how it goes back together.

These are mostly for fun and discovery, sun gear.
Planet gears are visible within the DCCD

Planet carrier is now removed.

Side view of the planet carrier

And down inside with the planet carrier removed

There balls sit in these ramps that activate the clutch and move the planet carrier towards the plates locking up the differential.
Since this is covering a 2004-2005 USDM DCCD you should have 12 plates, they follow in a pattern of splining to the case and then to the sun gear. This is the only true serviceable piece of this center diff, so once you have them out place the new 12 plates back in the same order.
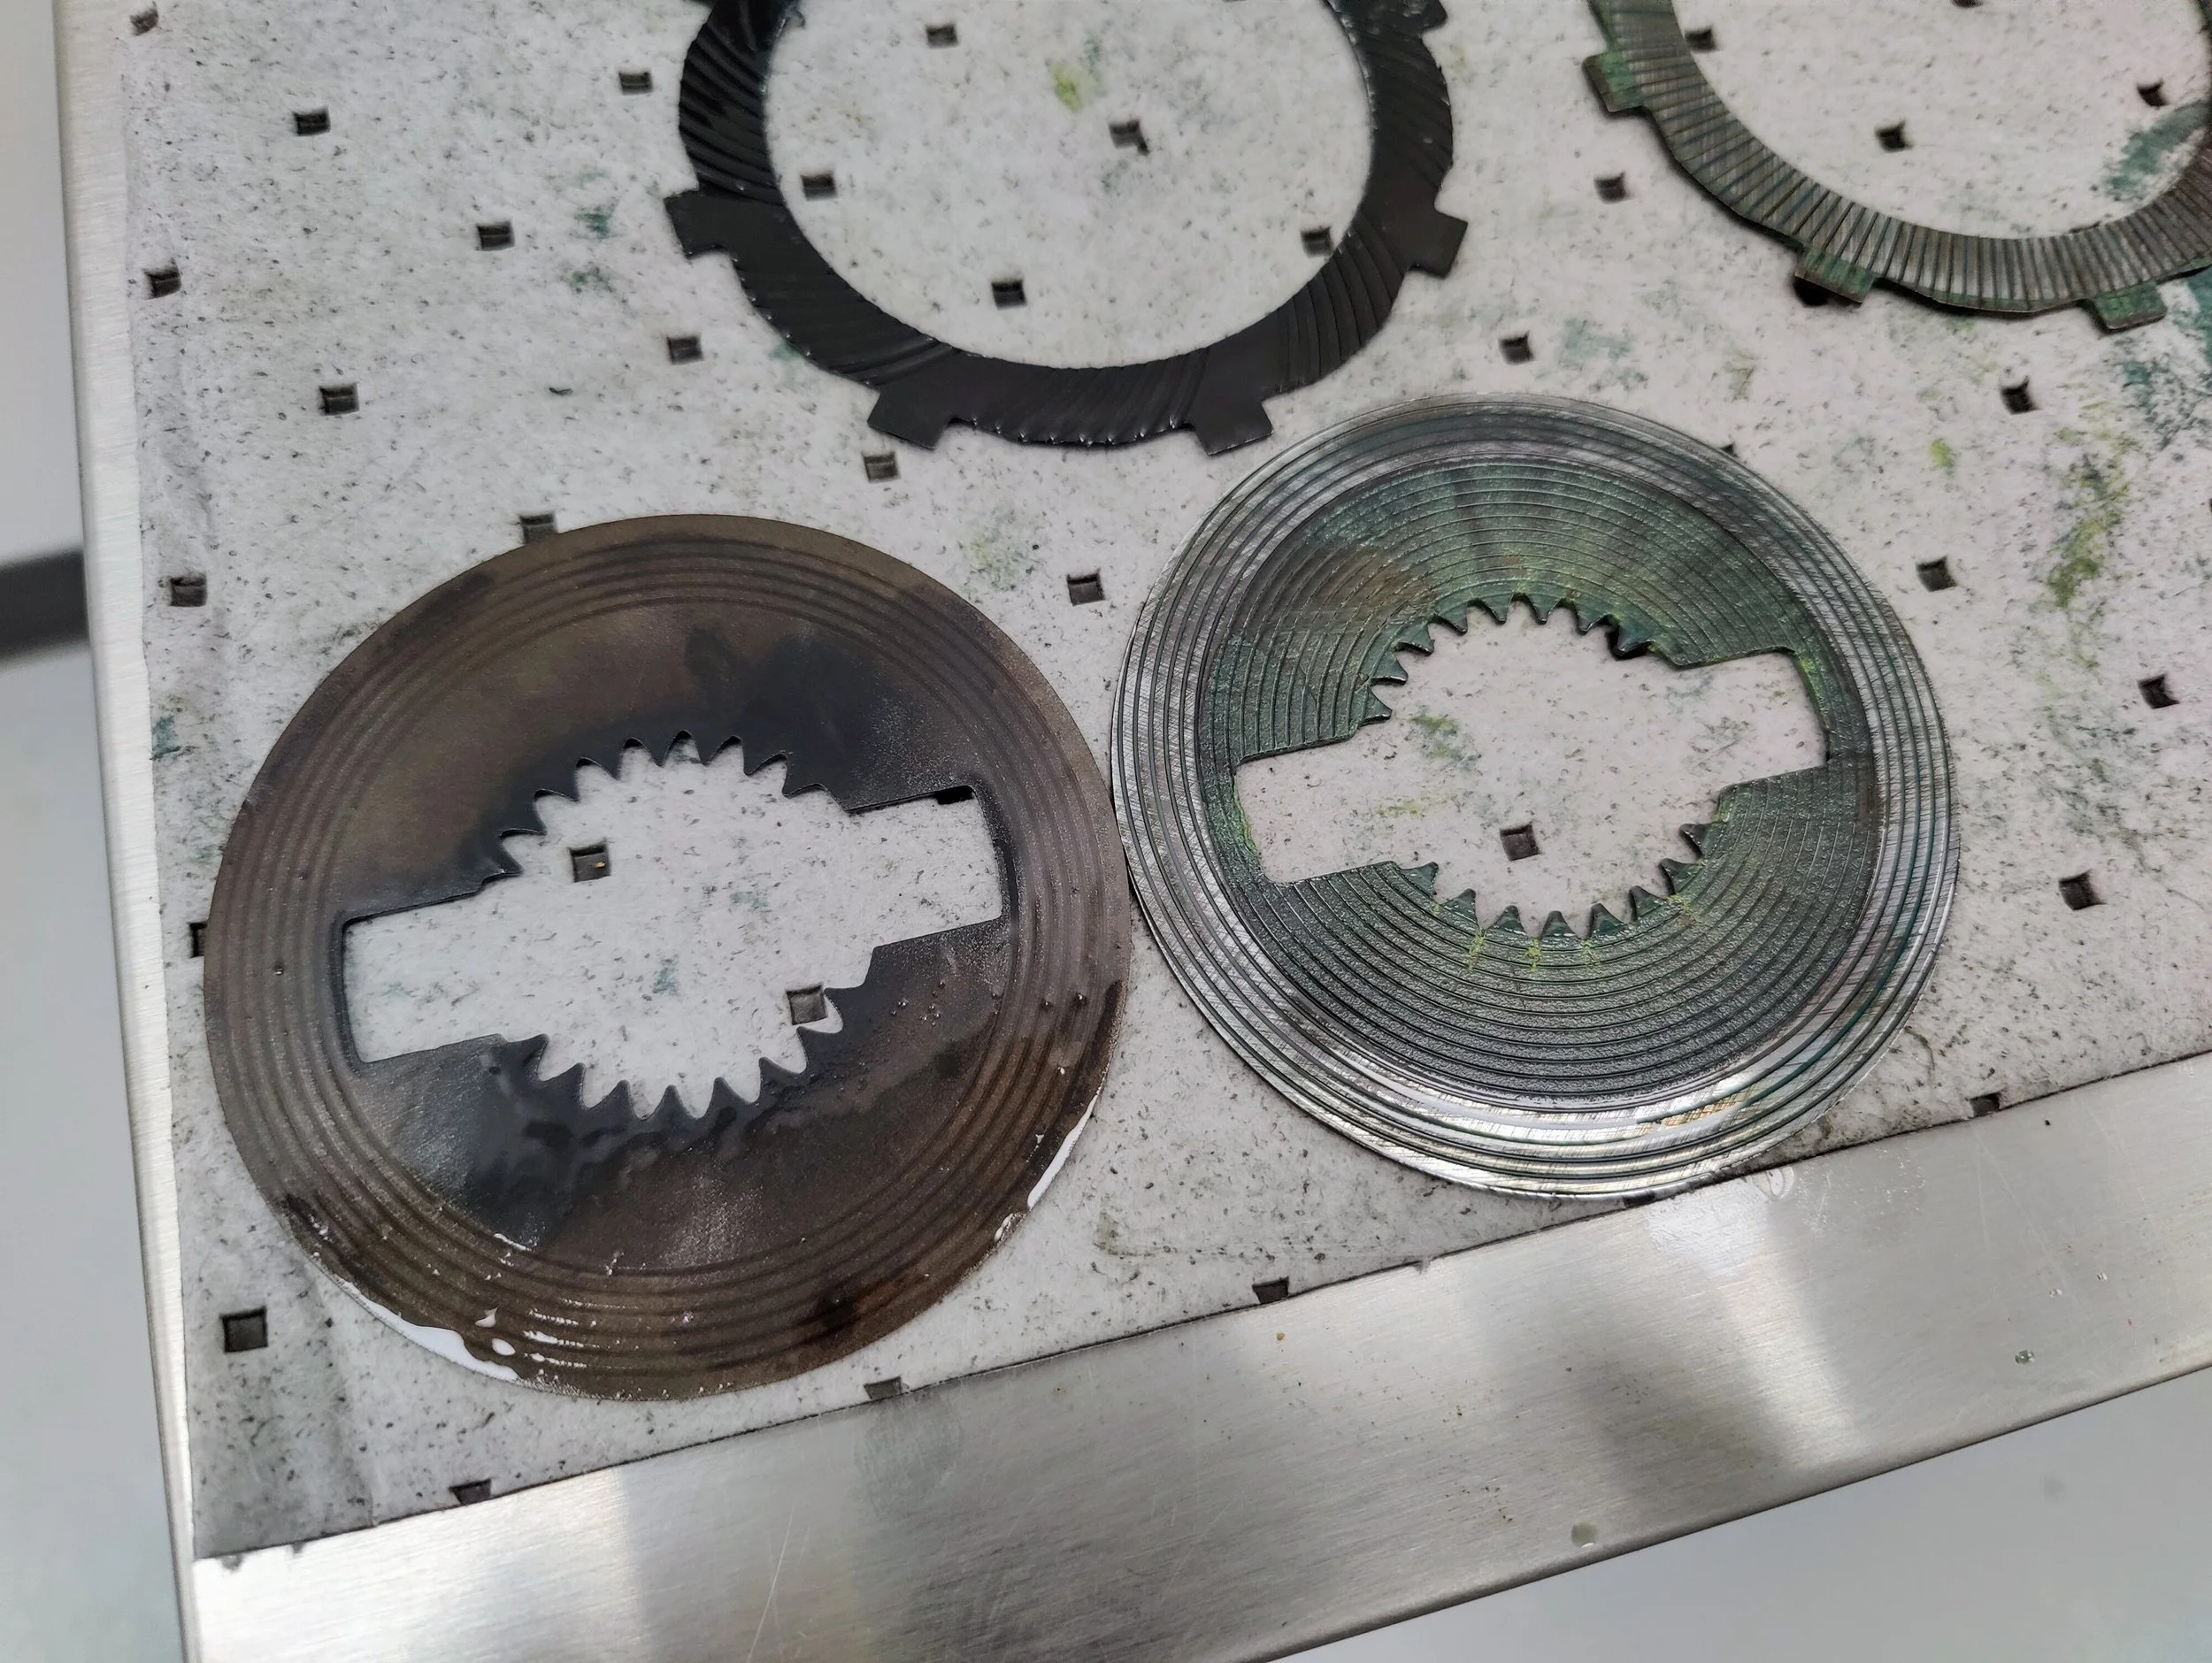
A few more shots of the plates side by side. Make sure you soak your plates prior to install. Mooresport plates come presoaked and ready to install.

More comparo shots.

Installing the plates in reverse order to how they came out.

The previous plate splined to the case. This plate splines to the sun gear.
Place your washer back on top, next the top goes on and you can place your snap ring back in. Everything now is just reversing order to put it all back together. I highly recommend using a touch of grease to hold the split needle bearings in as they tend to fall and can cause you many headaches when reinstalling the extension housing.
Last plate goes in and splines to the top cap. Washer is in place and ready for reinstallation.

DCCD goes back in with both sets of needle bearings.
Once everything is assembled you can add your silicone and bolt everything back in place.

Last step is putting it all back together and you can refill the fluids. Then double check for leaks before taking it on a short test drive.
And the task is complete! Congratz, you can now take it back and test the difference. My personal opinion is the Mooresport plates I replaced my oem ones with are quicker to react and engage. My oem plates have seen quite a bit through many days on the auto-x course so it is to be expected.
Amazon tool links
Milwaukee 3/8ths electric ratchet
Gearwrench 3/8” & 1/4’ ratchet set